Welcome to Rownd
Rownd is a PM5-based race control system for indoor rowing events. This guide covers everything needed to run a full event — from setting up teams to firing the starting gun.
You'll need an invite code from the Super Admin (Dan) and the Rownd Bridge app installed on the laptop connected to the rowing machines (Race Control only).
Roles & invites New
Everyone working on an event has a role for that event. The role is baked into the invite code you redeem — the Super Admin decides which type of invite to send you.
Race Control (one per event)
The primary operator. Runs the physical event — the laptop with PM5s plugged in, the person hitting Prepare → Start → Stop. There is exactly one Race Control per event because PM5s connect to a single laptop; two people firing race-engine commands would fight over the hardware.
- Can do: everything a Contributor can do, plus run Race Control, fire race-engine commands, drive the display, and invite additional Contributors.
- Cannot: invite another Race Control (only a Super Admin can reassign race control).
Contributor New
A helper for event setup. Handy when you're building the schedule the night before, or when you want someone else to manage teams/athletes while you focus on race day. You can have as many Contributors per event as you need.
- Can do: teams, athletes, tiers, race schedule, heats, participant assignment; read PM5 Devices; use the Simulation tab as a reference.
- Cannot: access Race Control, fire Prepare / Start / Stop, or mint Race Control invites.
Reassigning Race Control
If the primary operator can't run the event on the day, the Super Admin uses Revoke access on the Events page to free the slot, then sends a fresh Race Control invite to the replacement.
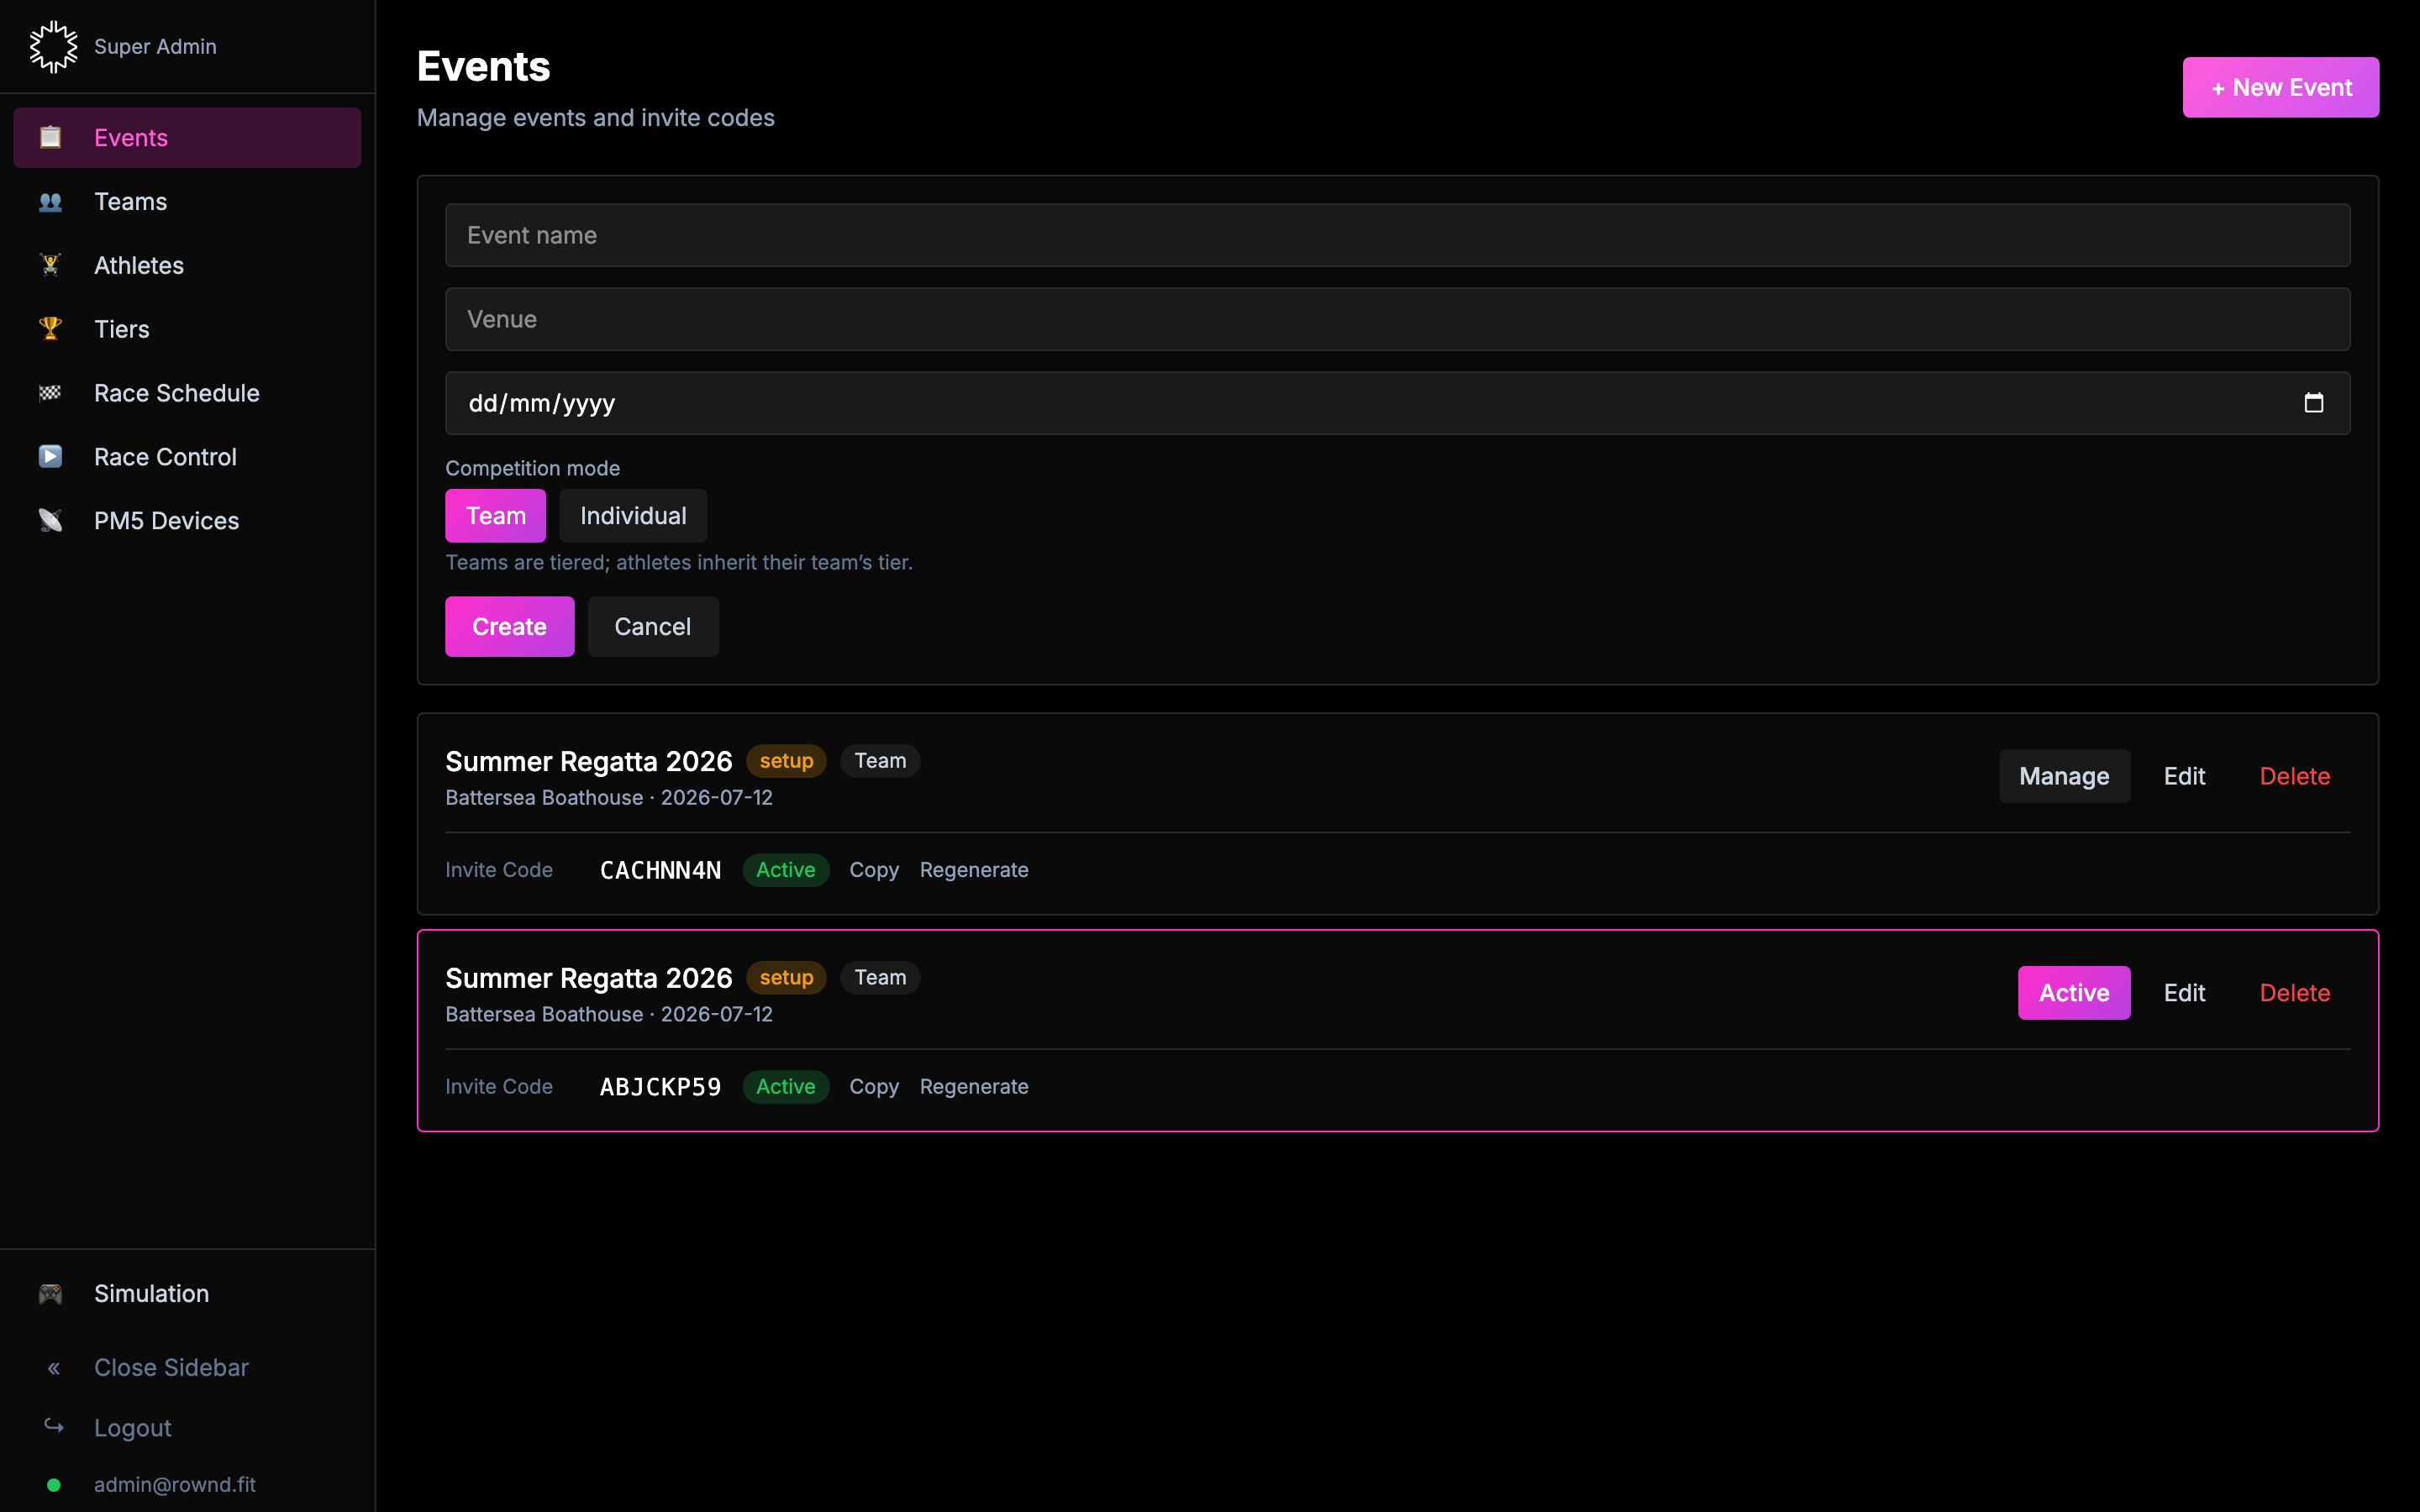
1. Create an event (Super Admin only)
If you're a Race Control operator or Contributor, an event has already been set up for you — skip ahead to Redeem an invite.
Set up the event
- Go to
/adminand sign in as Super Admin. - Click + New Event, fill in a name, venue, and date.
- Choose a competition mode:
- Team — tiers and leaderboards follow teams. Best for club vs club events.
- Individual — tiers apply per-athlete. Best for open races.
- Click Create. A Race Control invite code is generated automatically.
Invite your team
On the event card you'll see an Invites list. Use + Invite user to mint as many codes as you need — one per person.
- Primary operator (Race Control): copy the auto-generated code (or mint a fresh one) and send to the person running the venue laptop. Add a label like "Sarah — main operator" so you can track who got which code.
- Contributors: click + Invite user, pick Contributor, add a label (e.g. "John — schedule builder"), and share that code with them.
Redeem an invite code New
Different flows depending on whether you're brand new to Rownd or a returning operator:
Brand new user (first time)
- Go to
/admin. - Click Have an invite code? under the login form.
- Paste the code, set your email + password. Click Redeem.
- You land on your event immediately. Your role (Race Control or Contributor) is shown as a badge on the event card.
Already have a Rownd account
- Log in with your existing email + password at
/admin. - On the Events page, click + Redeem Invite Code in the top-right.
- Paste the new code and click Redeem. The new event appears in your list with a green highlight.
- Click Manage on the new event when you're ready to work on it.
2. Install the bridge app
The Rownd Bridge is a small desktop app that reads PM5 data over USB and relays it to the cloud. It's required for any event using real hardware.
Download
- On the laptop that will be plugged into the rowers, visit rownd.fit/download.
- Click Download for Mac (
.dmg) or Download for Windows (.exe). - Open the downloaded file.
- Mac: drag Rownd Bridge into the Applications folder.
- Windows: run the installer and accept the prompts.
First launch on macOS — bypass Gatekeeper Important
The bridge isn't notarised with Apple yet, so macOS will block the first launch with a warning like "Rownd Bridge can't be opened because Apple cannot check it for malicious software" or "Rownd Bridge is damaged and can't be opened". This is expected — use one of the paths below to allow it.
Option A — Right-click Open (simplest)
- Open the Applications folder in Finder.
- Right-click (or
Ctrl-click) Rownd Bridge. - Click Open from the menu.
- A dialog appears with an Open button — click it.
- The app launches. Future launches work by double-click.
Option B — Privacy & Security panel
- Double-click Rownd Bridge and dismiss the warning dialog.
- Open System Settings → Privacy & Security.
- Scroll down. You'll see "Rownd Bridge was blocked…" with an Open Anyway button next to it.
- Click Open Anyway, then click Open in the confirmation dialog.
Option C — If macOS says the app is "damaged"
On recent macOS versions the OS sometimes adds a quarantine flag that prevents the two options above from working and makes the app appear "damaged". Clear the quarantine attribute from Terminal:
xattr -cr /Applications/Rownd\ Bridge.app
Then double-click the app normally.
First launch on Windows
Windows SmartScreen may show "Windows protected your PC". Click More info → Run anyway.
Activate the bridge
- When the app opens, paste the invite code you got from the Super Admin.
- The app connects to the cloud and stays active in the menu bar (Mac) or system tray (Windows).
- Plug in every PM5 you plan to use via USB.
- In the admin, open PM5 Devices — every connected rower should appear within a few seconds.
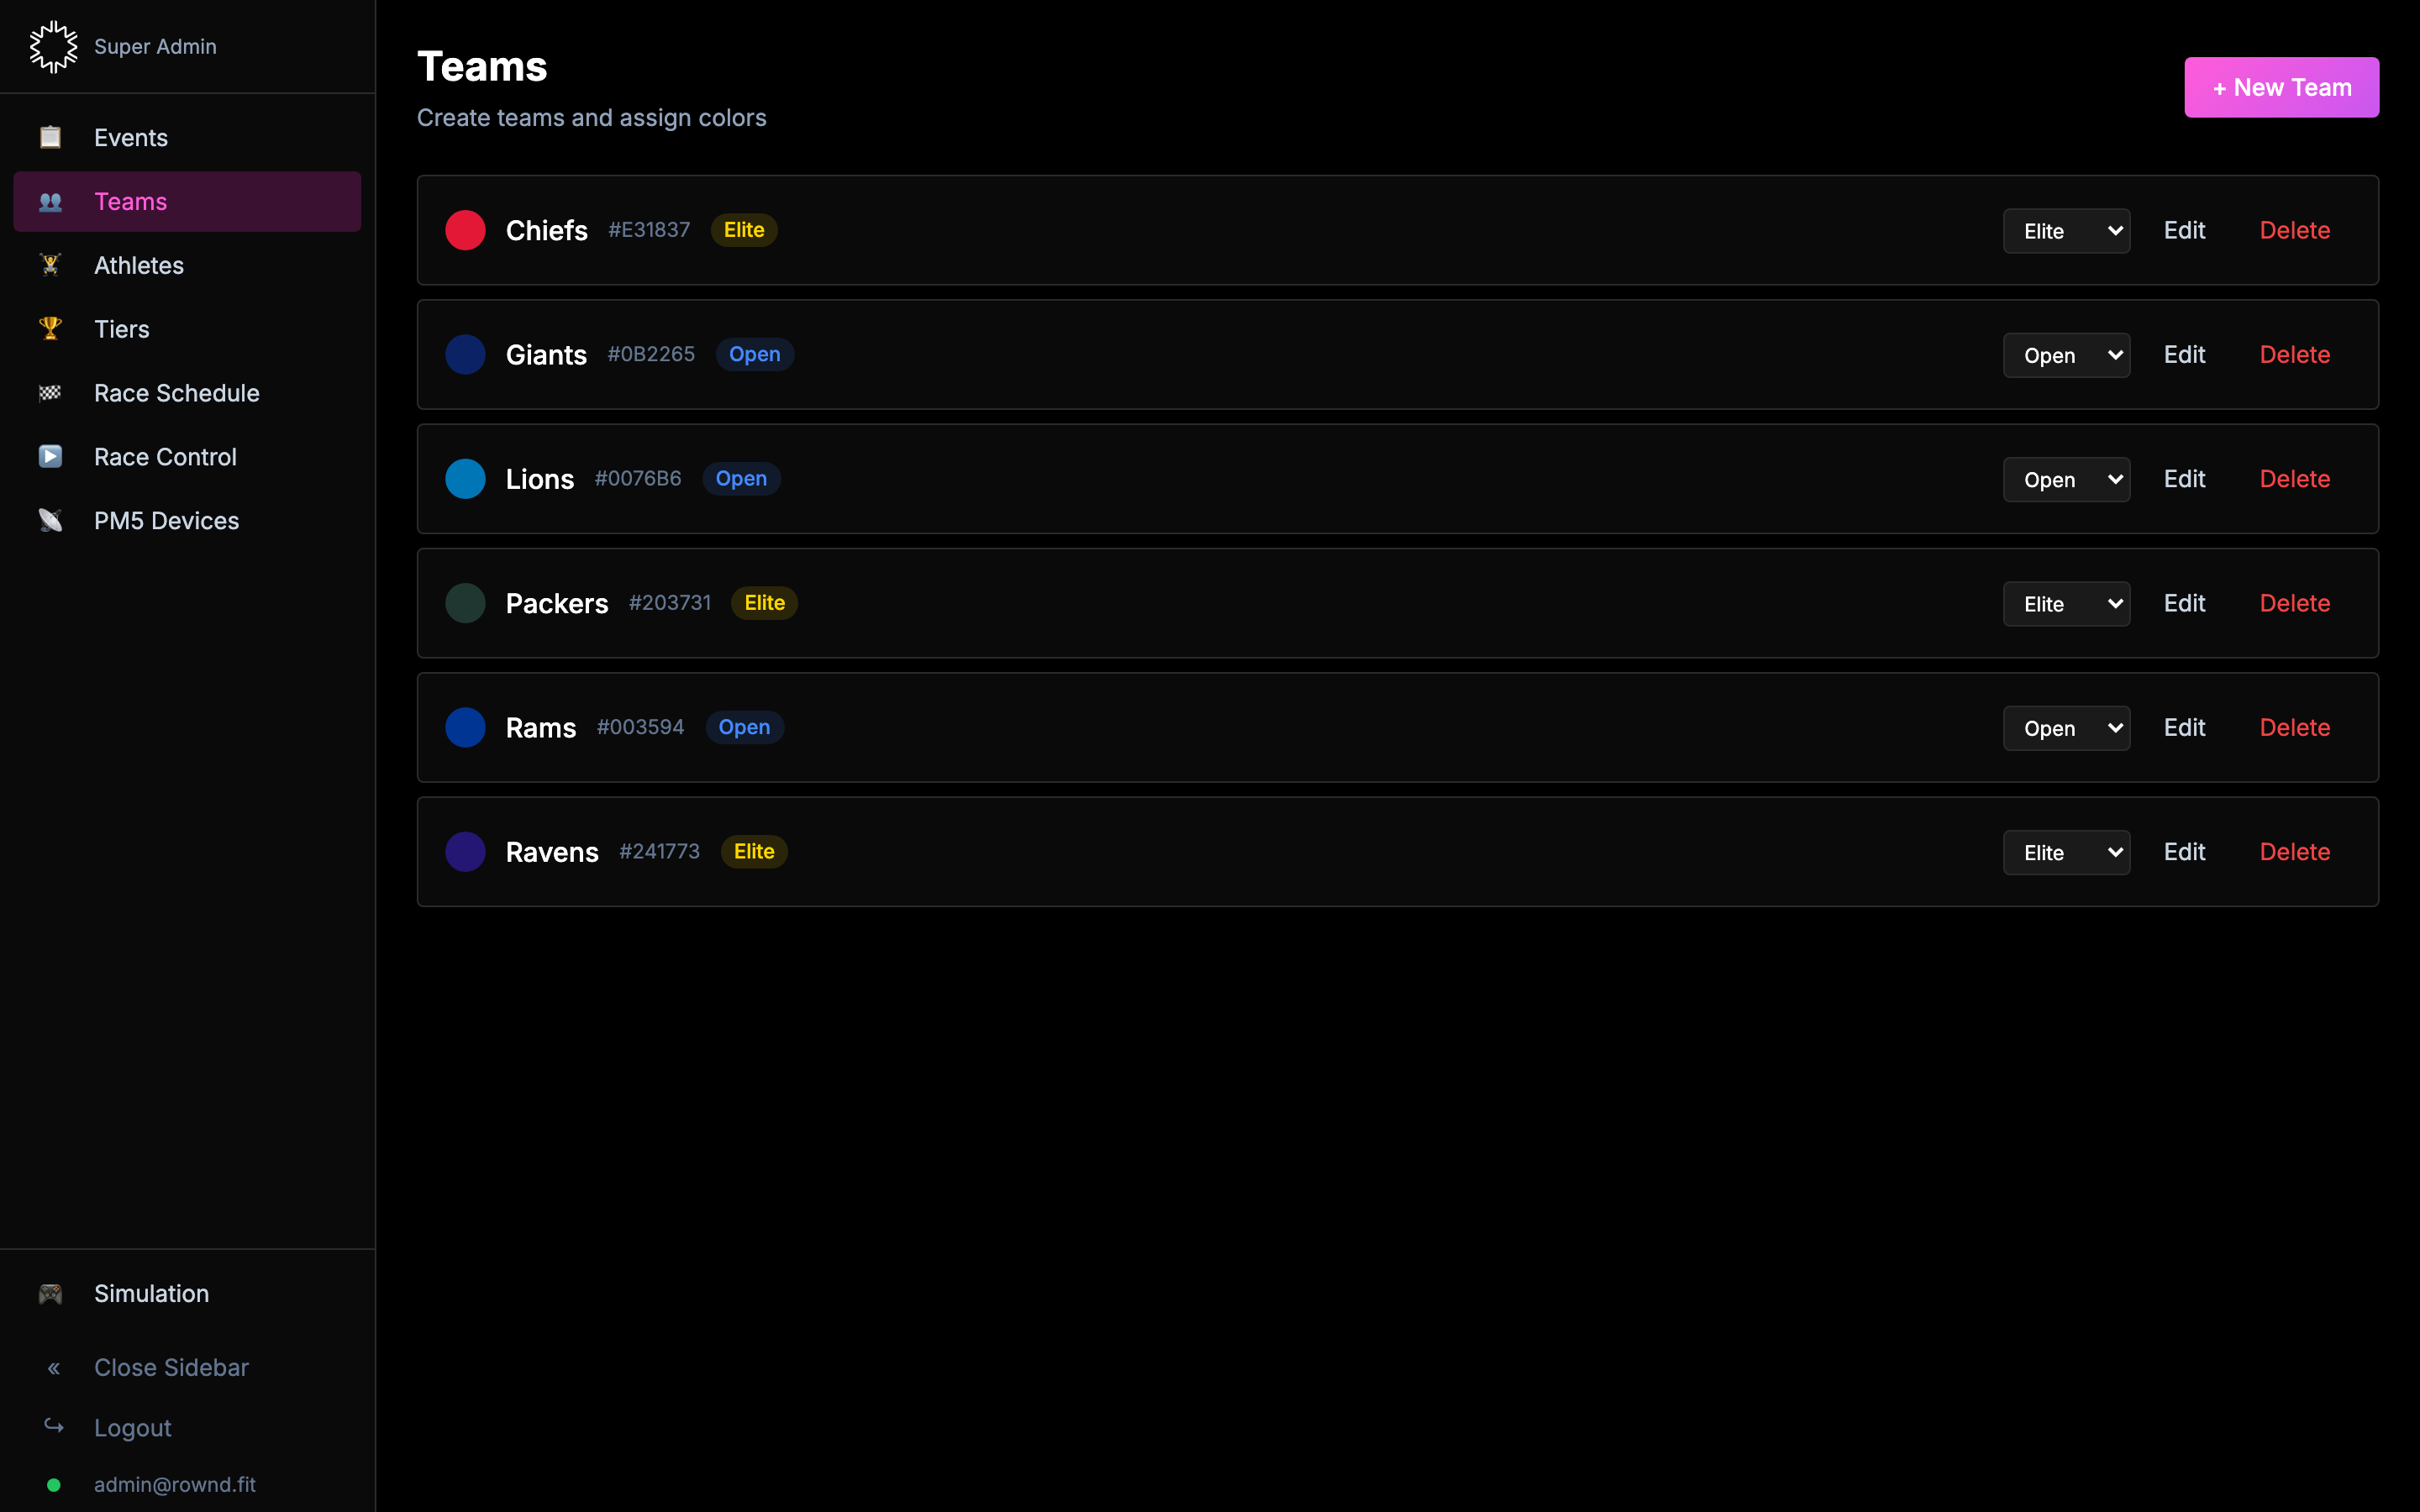
3. Create teams
Teams are colour-coded groups that athletes belong to. Team colours flow through every display screen, so pick something punchy.
- Open the Teams tab.
- Click + New Team, enter a name, pick a colour from the palette.
- Click Create. Repeat for each team.
- Edit or delete any team using the buttons on the right of its row.
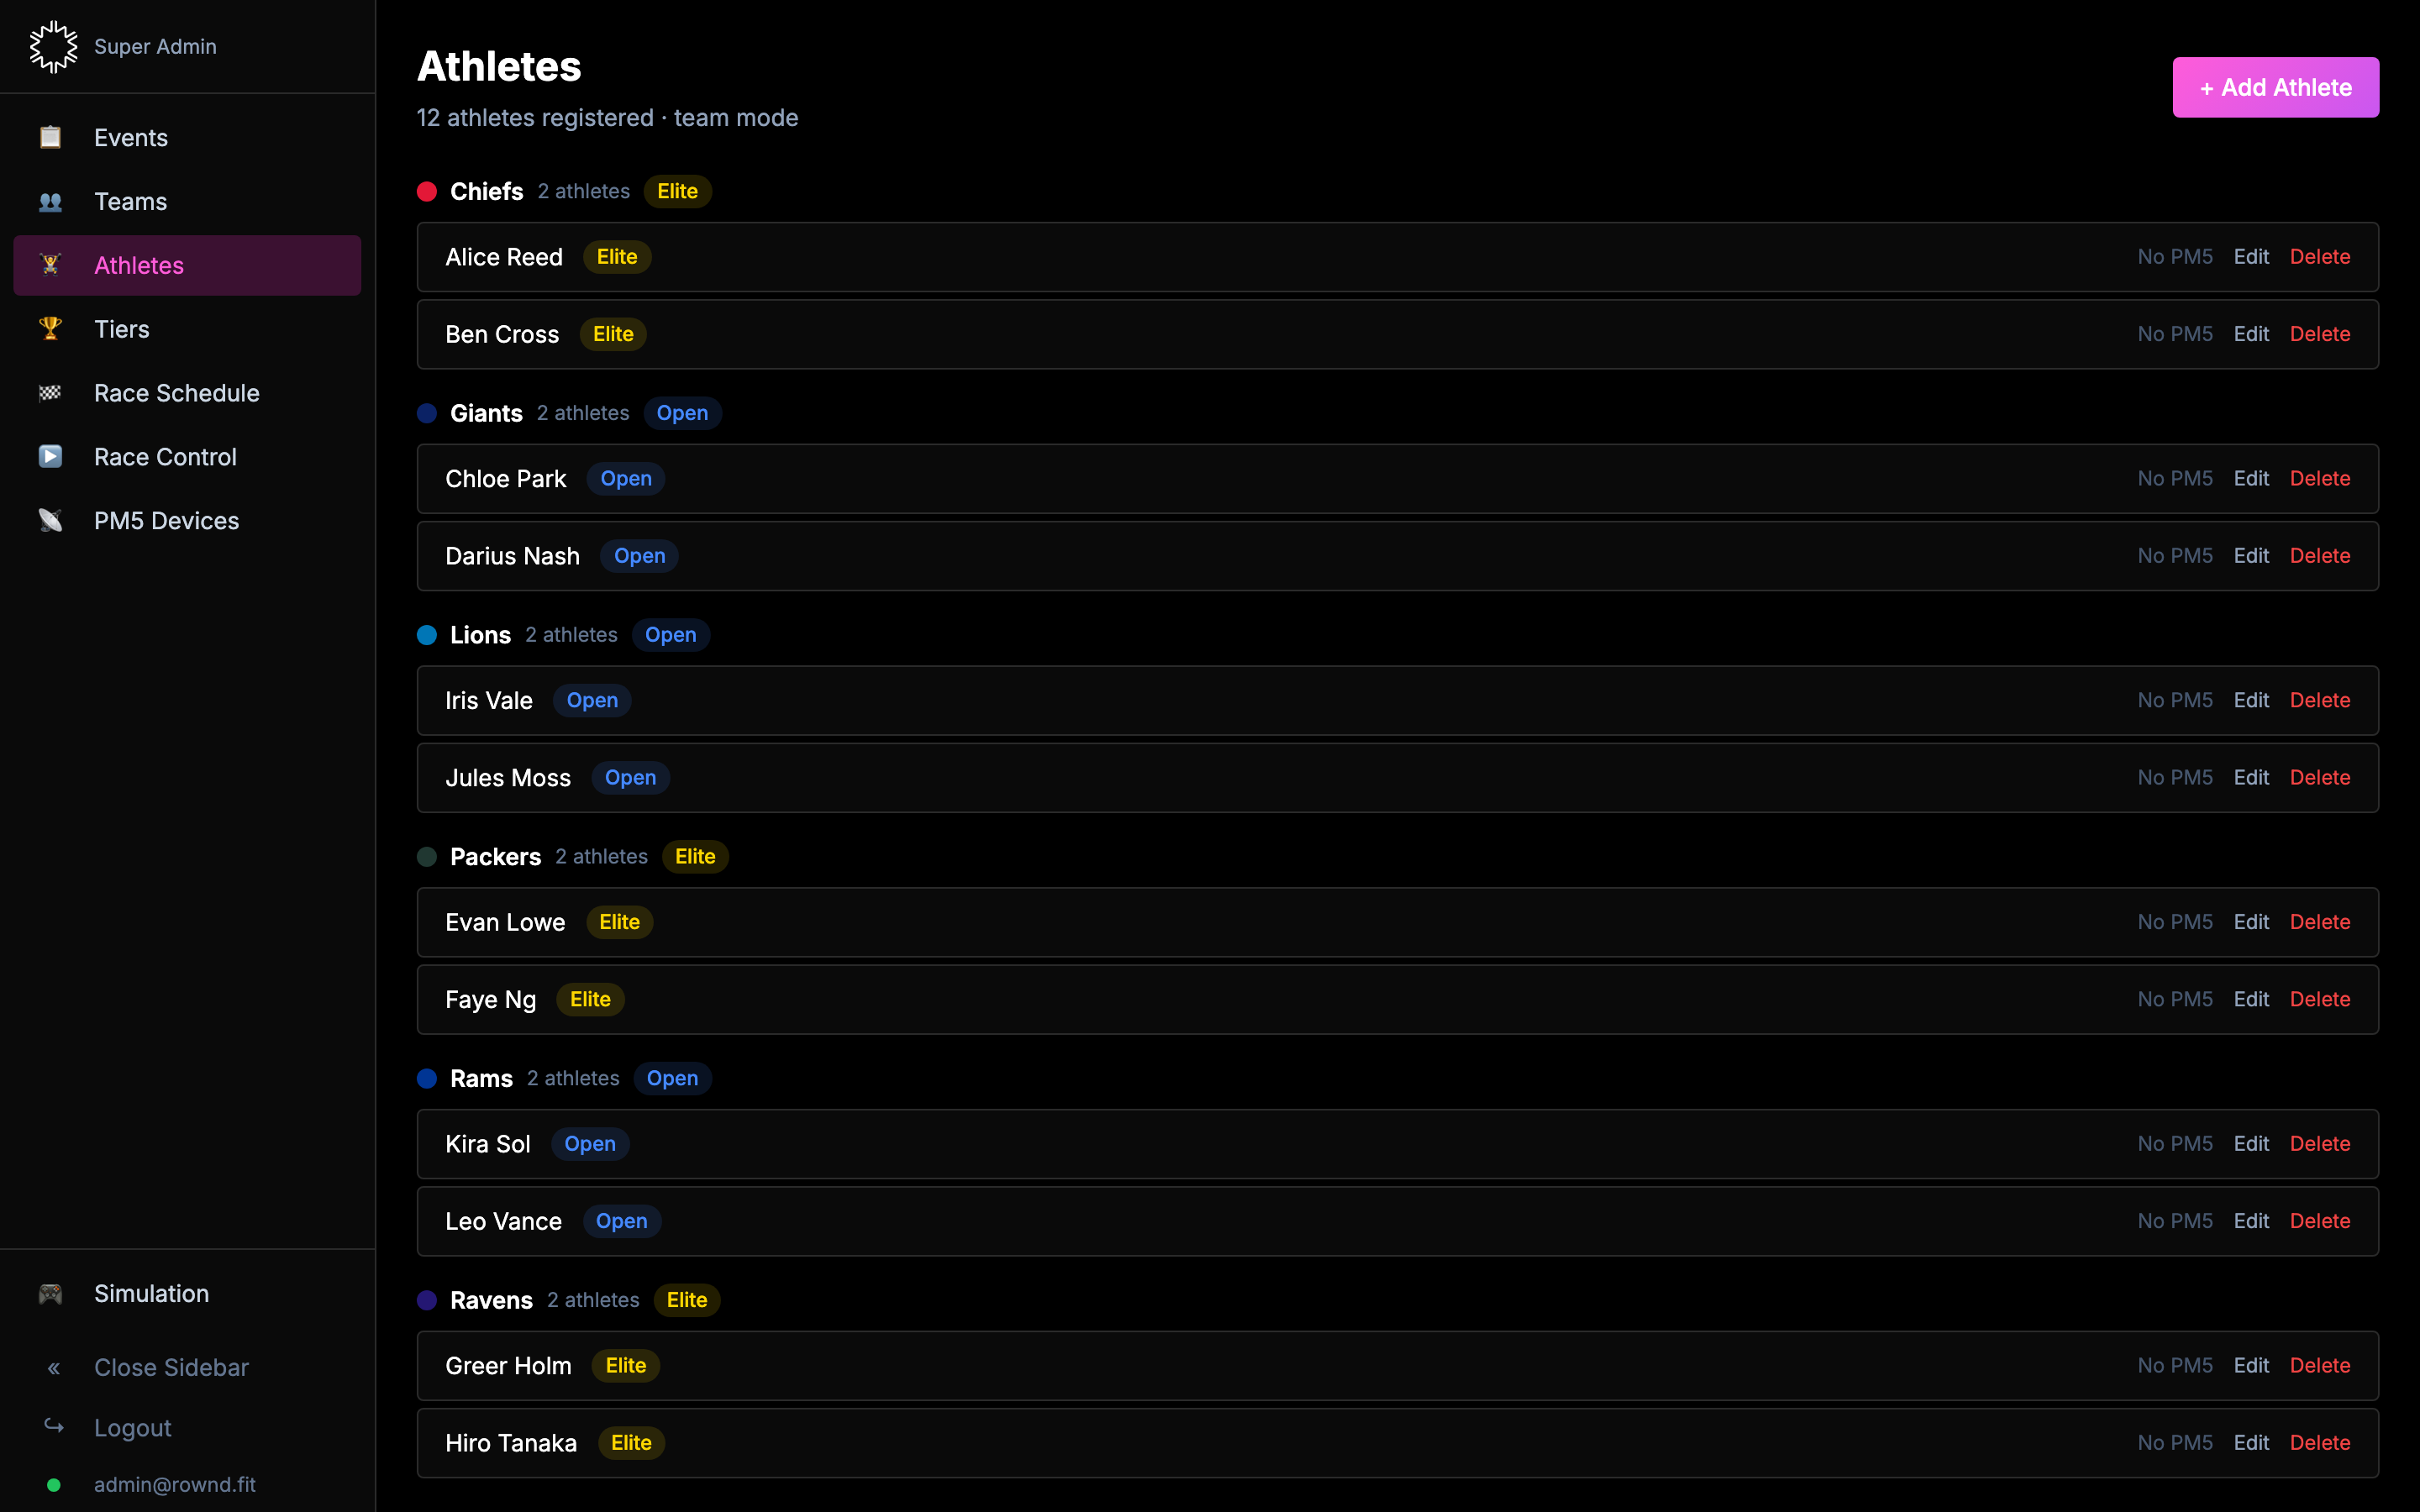
4. Add athletes
Athletes are the individual rowers. Each one belongs to a team (or none, if you're running an individual-mode event) and is assigned to one PM5 for the event.
- Open the Athletes tab.
- Click + Add Athlete. Enter a name, an optional nickname, pick a team.
- Pick a PM5 device from the dropdown — only PM5s currently connected through the bridge appear here.
- Click Add.
Athletes are grouped by team on the Athletes page. Tier badges are shown next to athlete names once a qualifier has been committed.
Assigning PM5 devices
Each athlete should map to exactly one PM5 for the event. If you're not sure which physical machine is which device ID, open the PM5 Devices tab — you can give each device a friendly nickname (e.g. Row 1, Row 2) which then appears in all dropdowns.
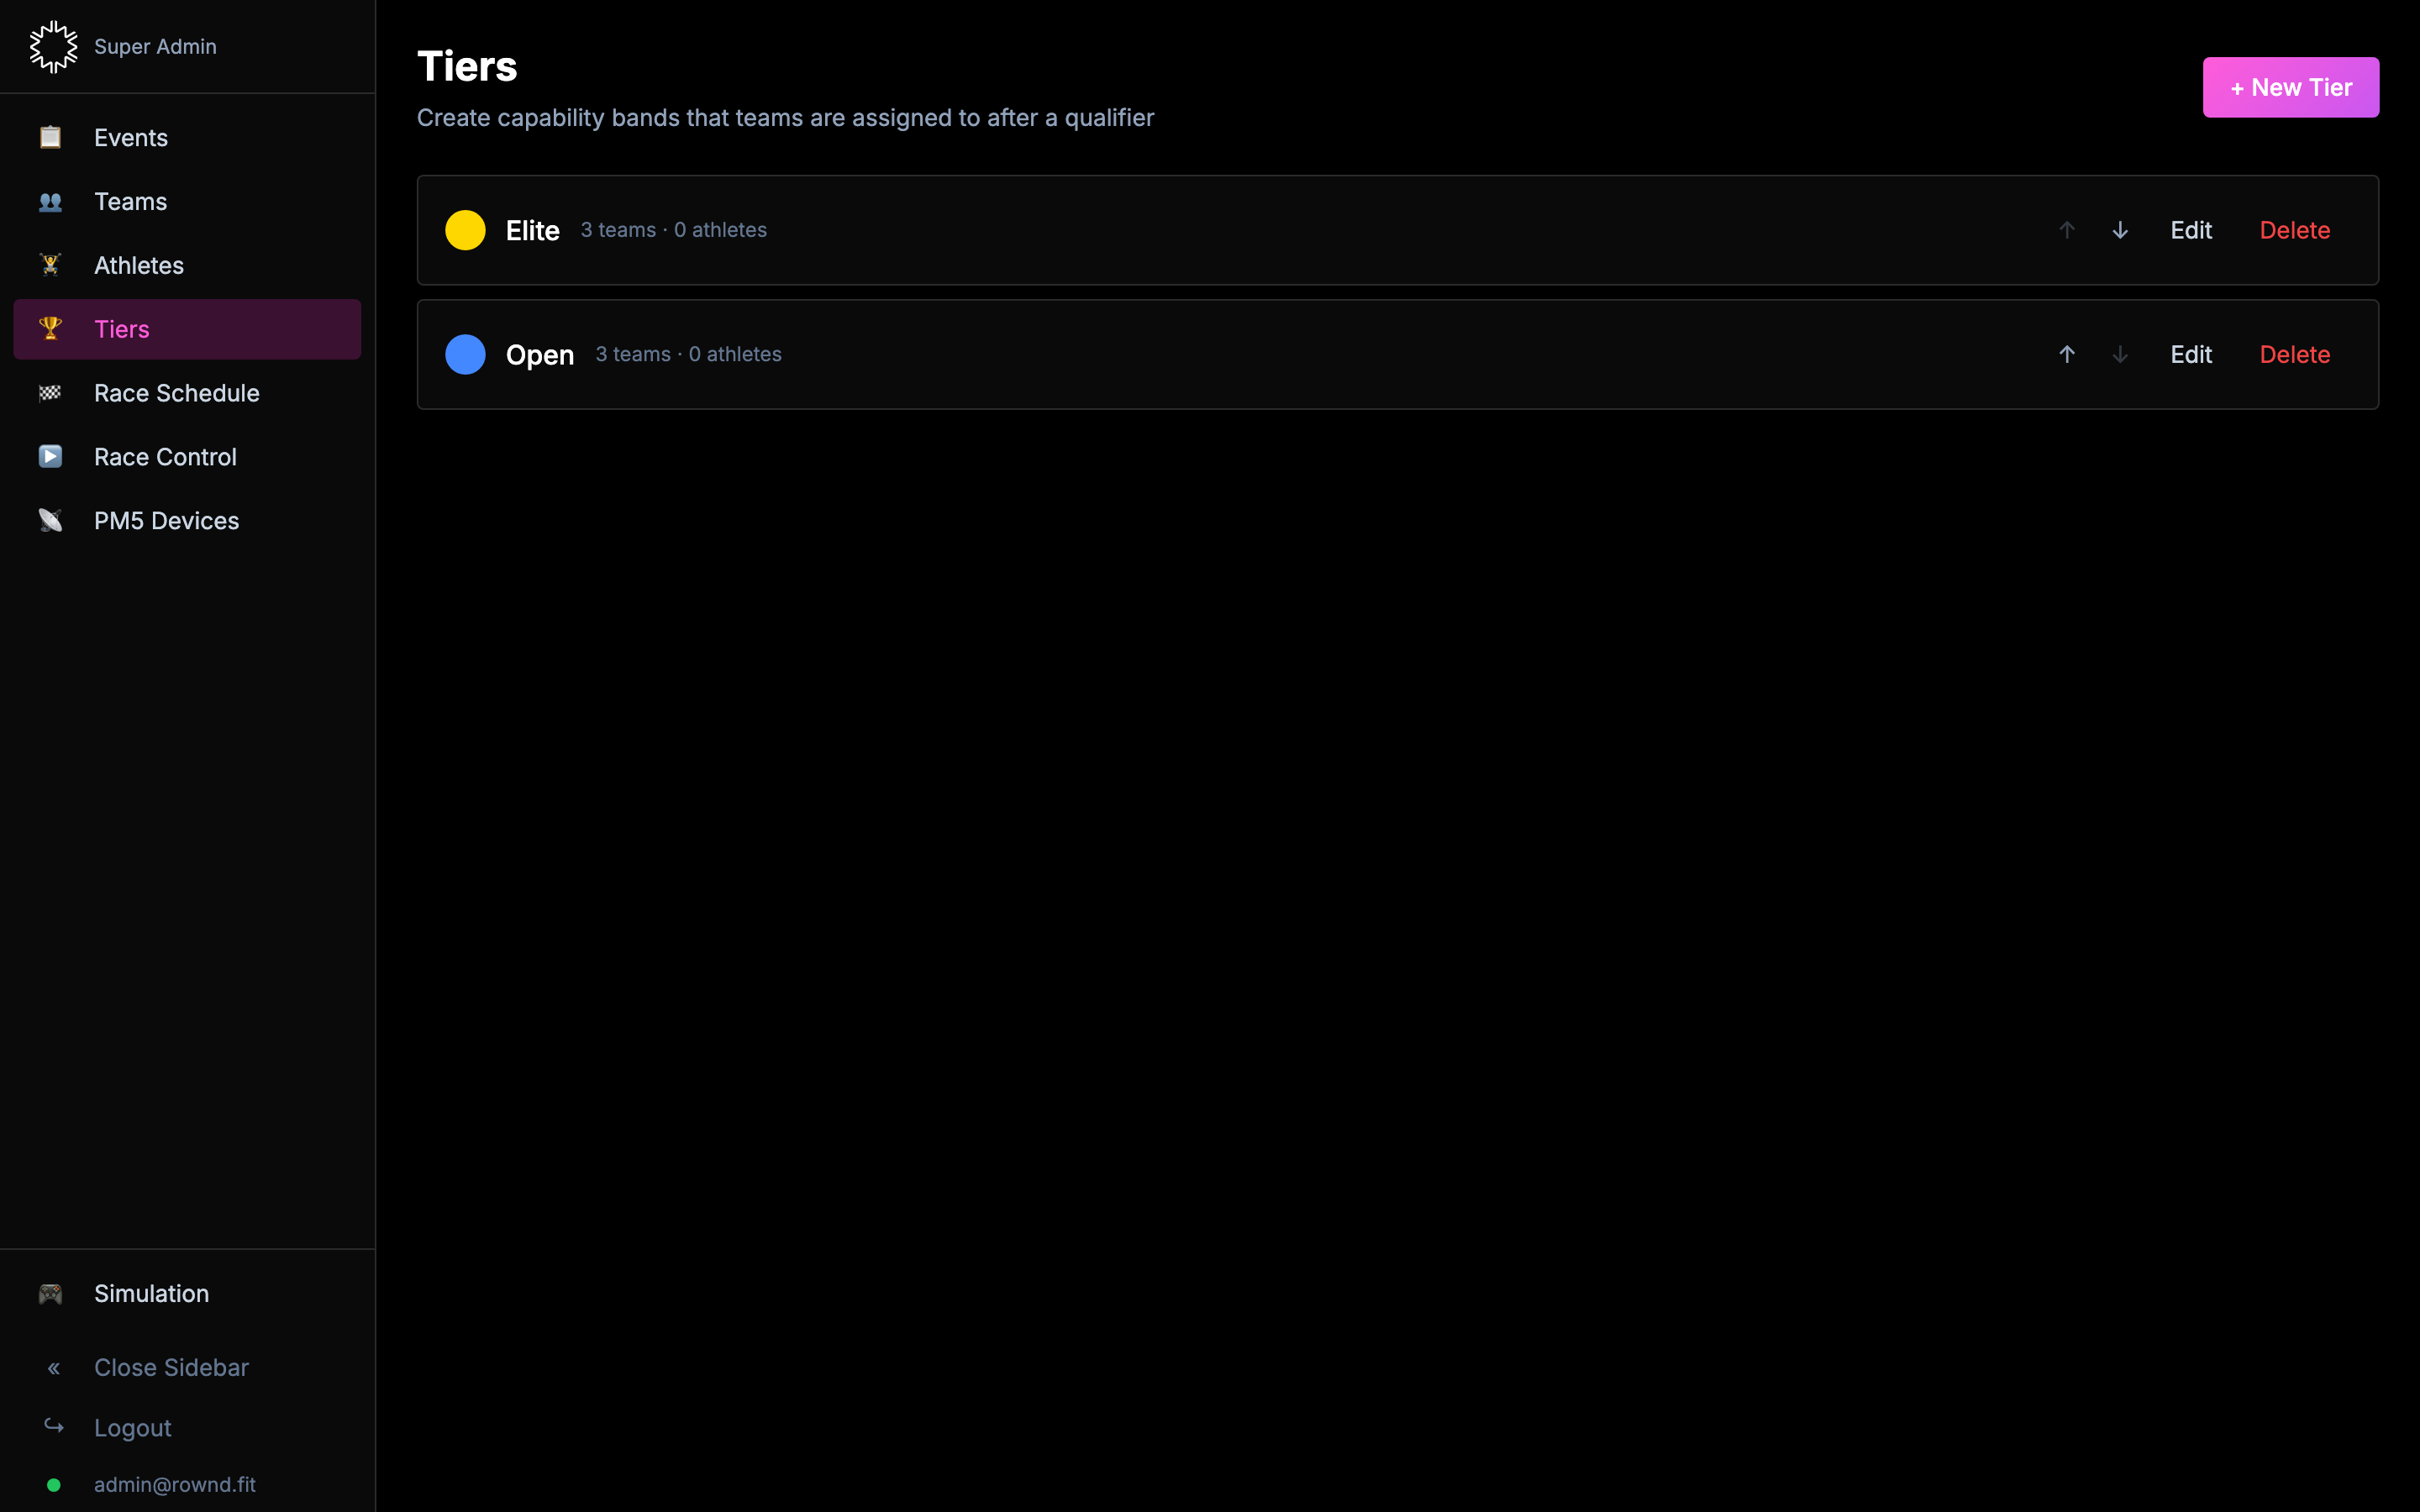
5. Create tiers New
Tiers are capability bands. They let you separate a tier-1 crew from a first-timer office team so leaderboards and scoring don't mix them. Create the tiers first — you'll assign teams to them later, either manually or via a qualifier.
- Open the Tiers tab.
- Click + New Tier and give each a name and colour (e.g. Elite, Open).
- Use the ↑ / ↓ buttons to set the rank order (top tier first).
Quick-start templates are available when your tier list is empty: Elite / Open or Div 1 / Div 2 / Div 3.
6. Run a qualifier New
A qualifier is any compatible race you use to rank teams (or athletes) into tiers. Qualifier results drive tier assignment for the rest of the event.
Which race types can be qualifiers?
- Standard (distance mode) — race to a fixed distance
- Link — duration-based team row
- Track — Scratch
- Track — Switch (relay)
Race types that score by elimination, points, or penalty-weighted power (The Push, Track — Chase, Cadence) cannot be used as qualifiers — the checkbox is disabled for those types.
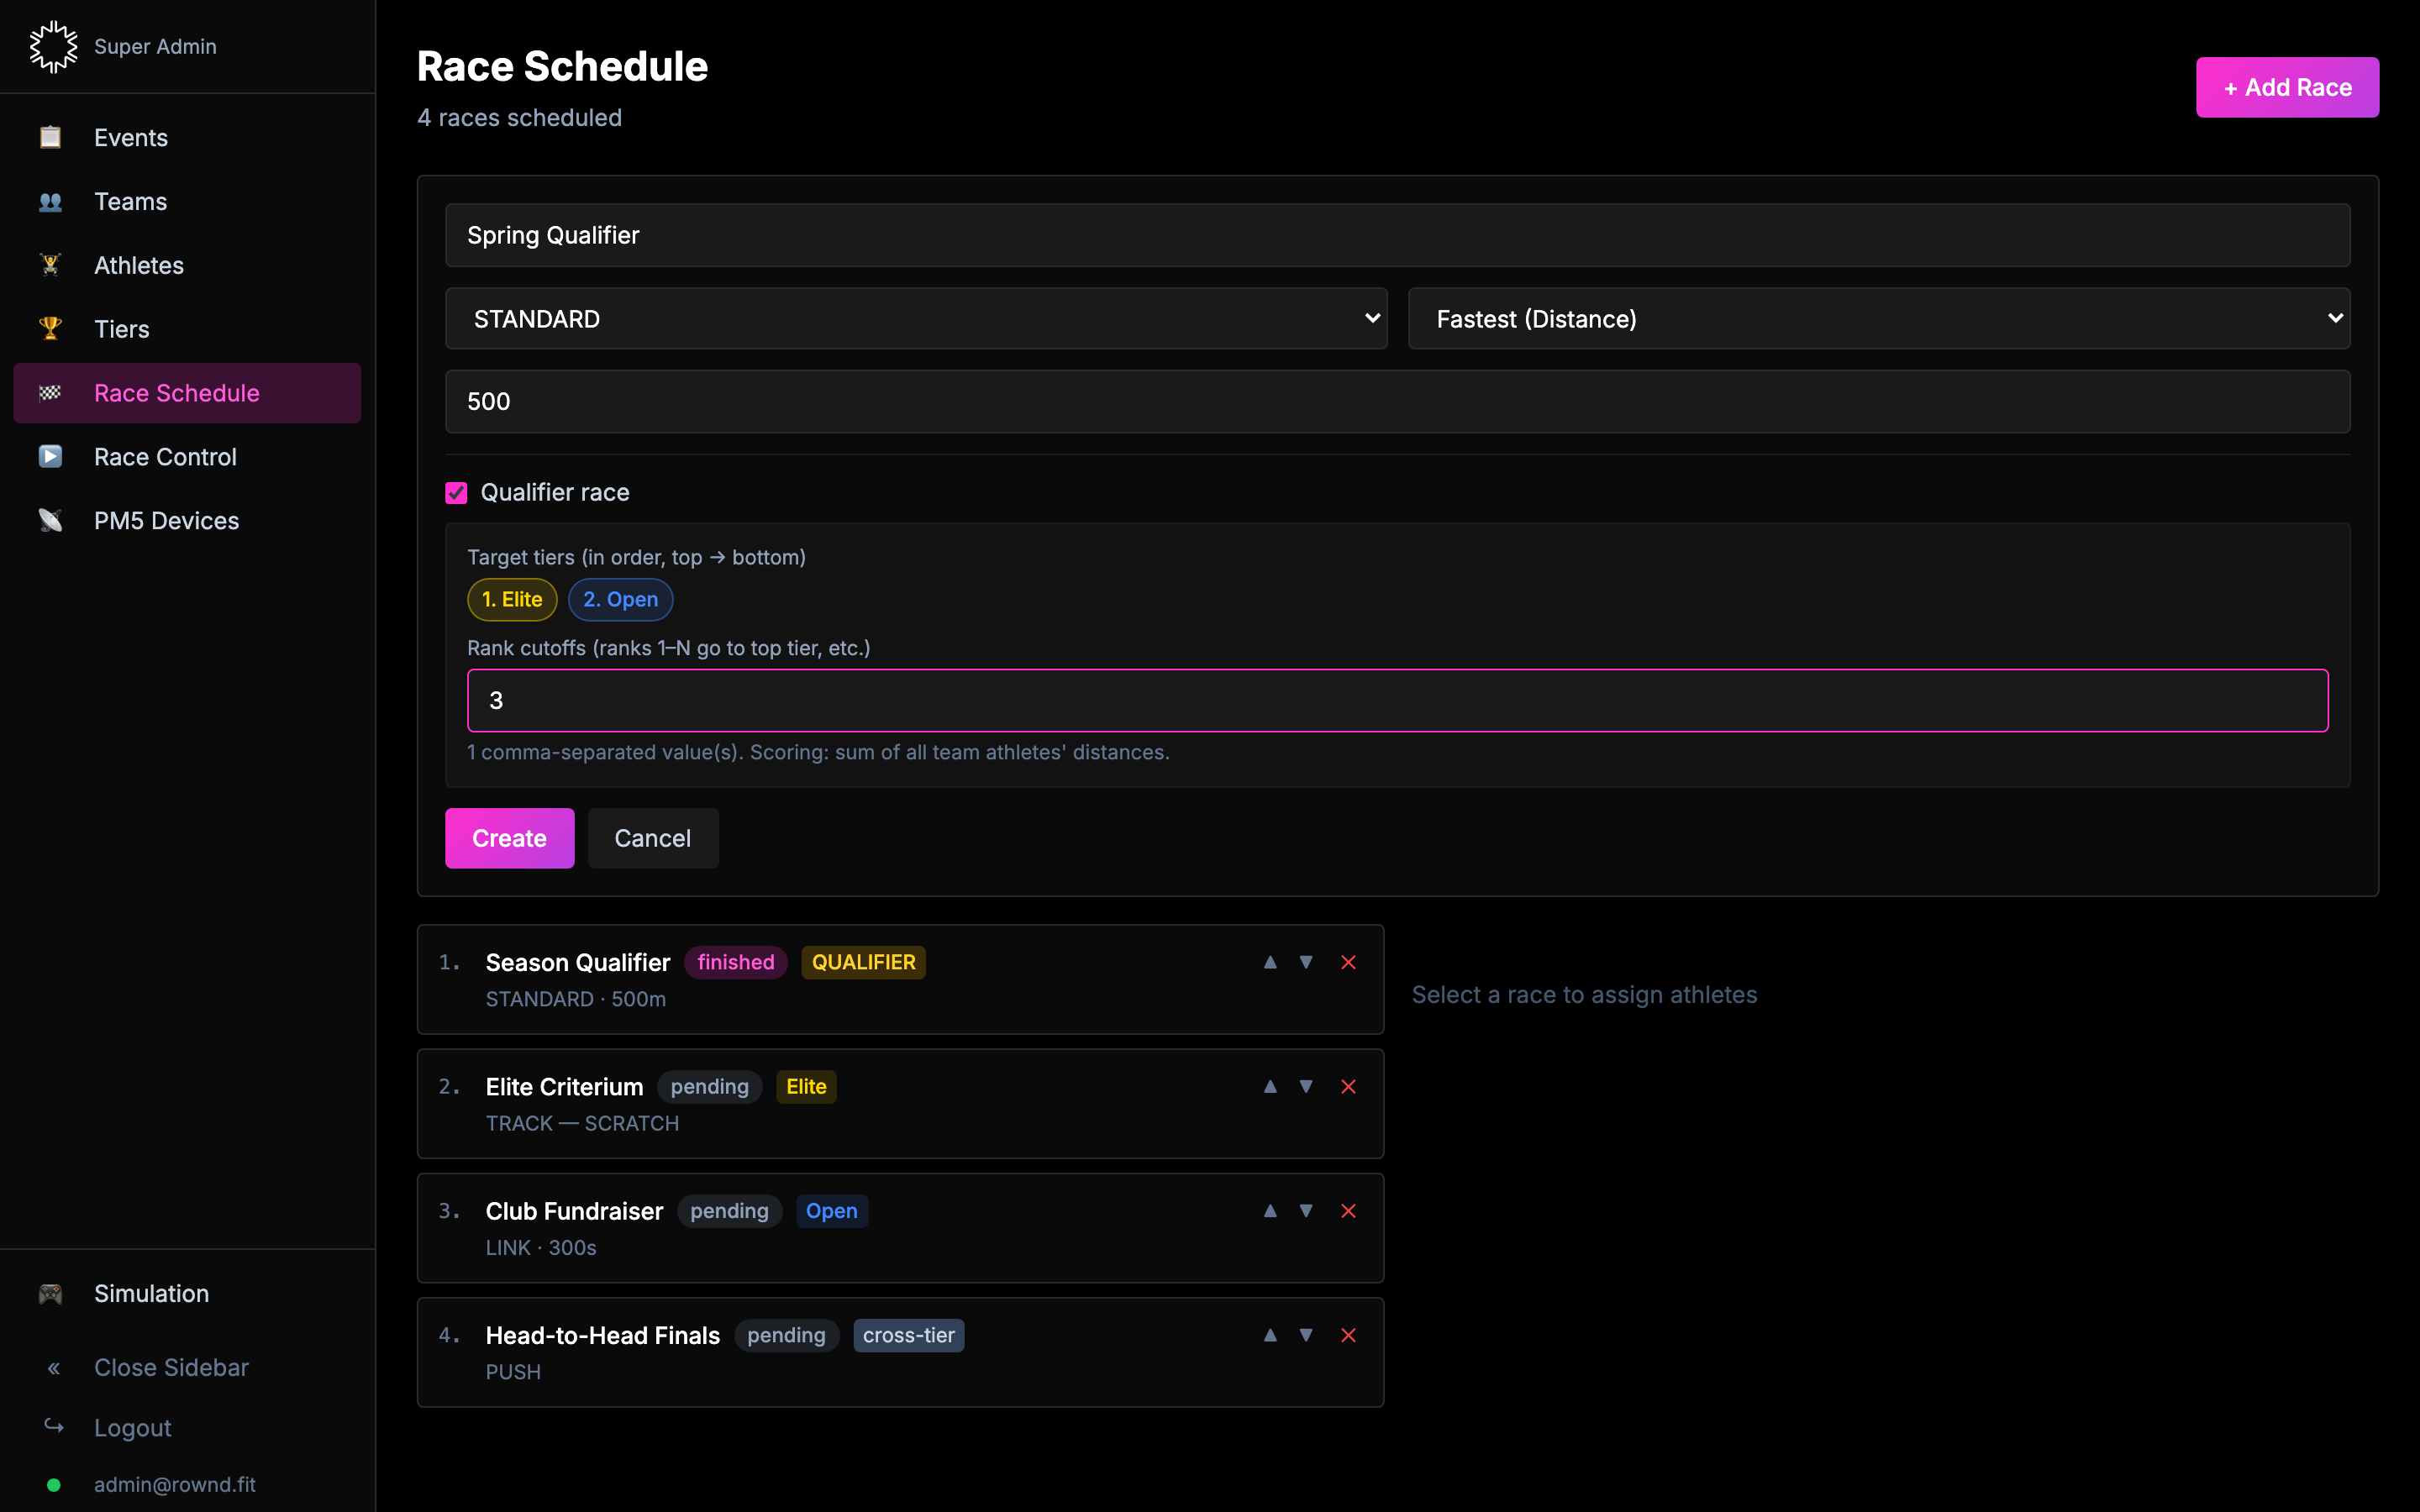
Setting up a qualifier
- Go to Race Schedule → + Add Race.
- Pick a compatible race type (e.g. STANDARD distance mode).
- Tick Qualifier race. A new config panel appears.
- Select the target tiers in top-to-bottom order (numbered buttons).
- Enter the rank cutoffs — e.g. for 2 tiers, entering
4puts ranks 1–4 in the top tier and everyone else in the bottom tier. - Create the race and assign all teams as participants (qualifiers bypass tier filtering — everyone's eligible).
7. Commit tier assignments New
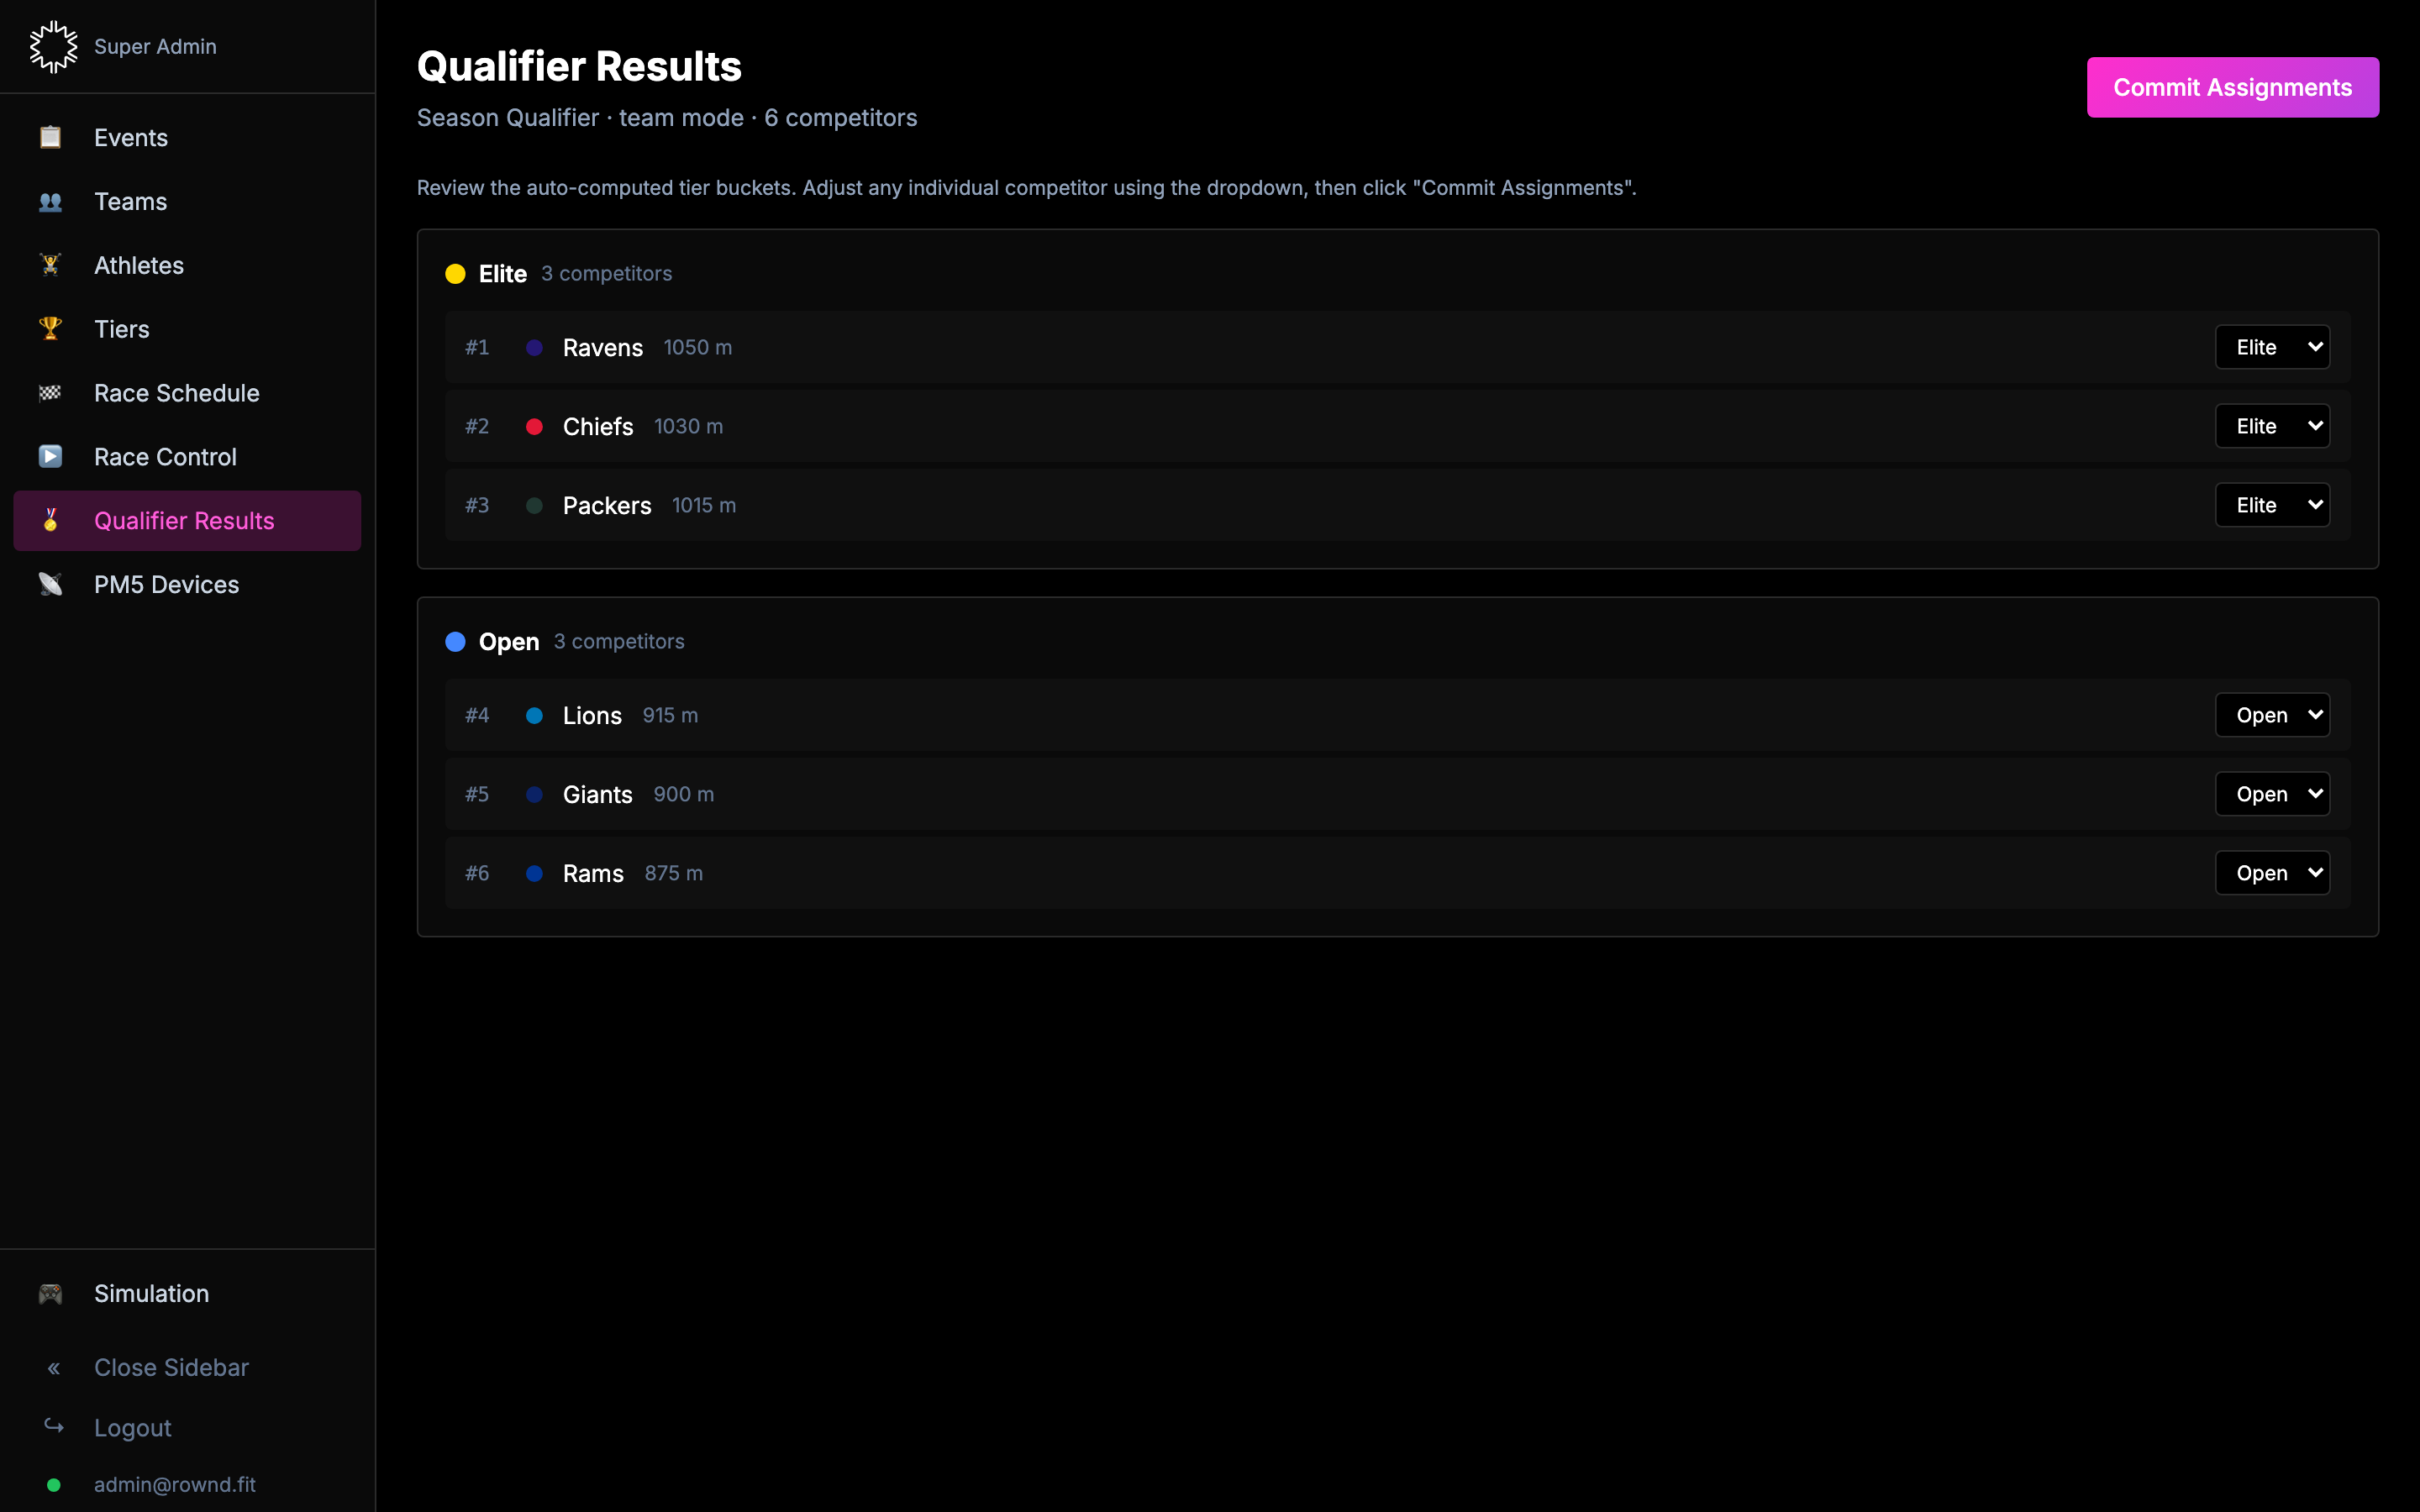
When every heat of the qualifier has finished, a Qualifier Results entry appears in the sidebar.
- Click Qualifier Results. The suggested tier buckets are pre-computed from the combined distance of each team.
- Review the ranking. To move a team to a different tier, use the dropdown on its row.
- Click Commit Assignments. Tier badges update instantly on every team and athlete.
8. Build the race schedule
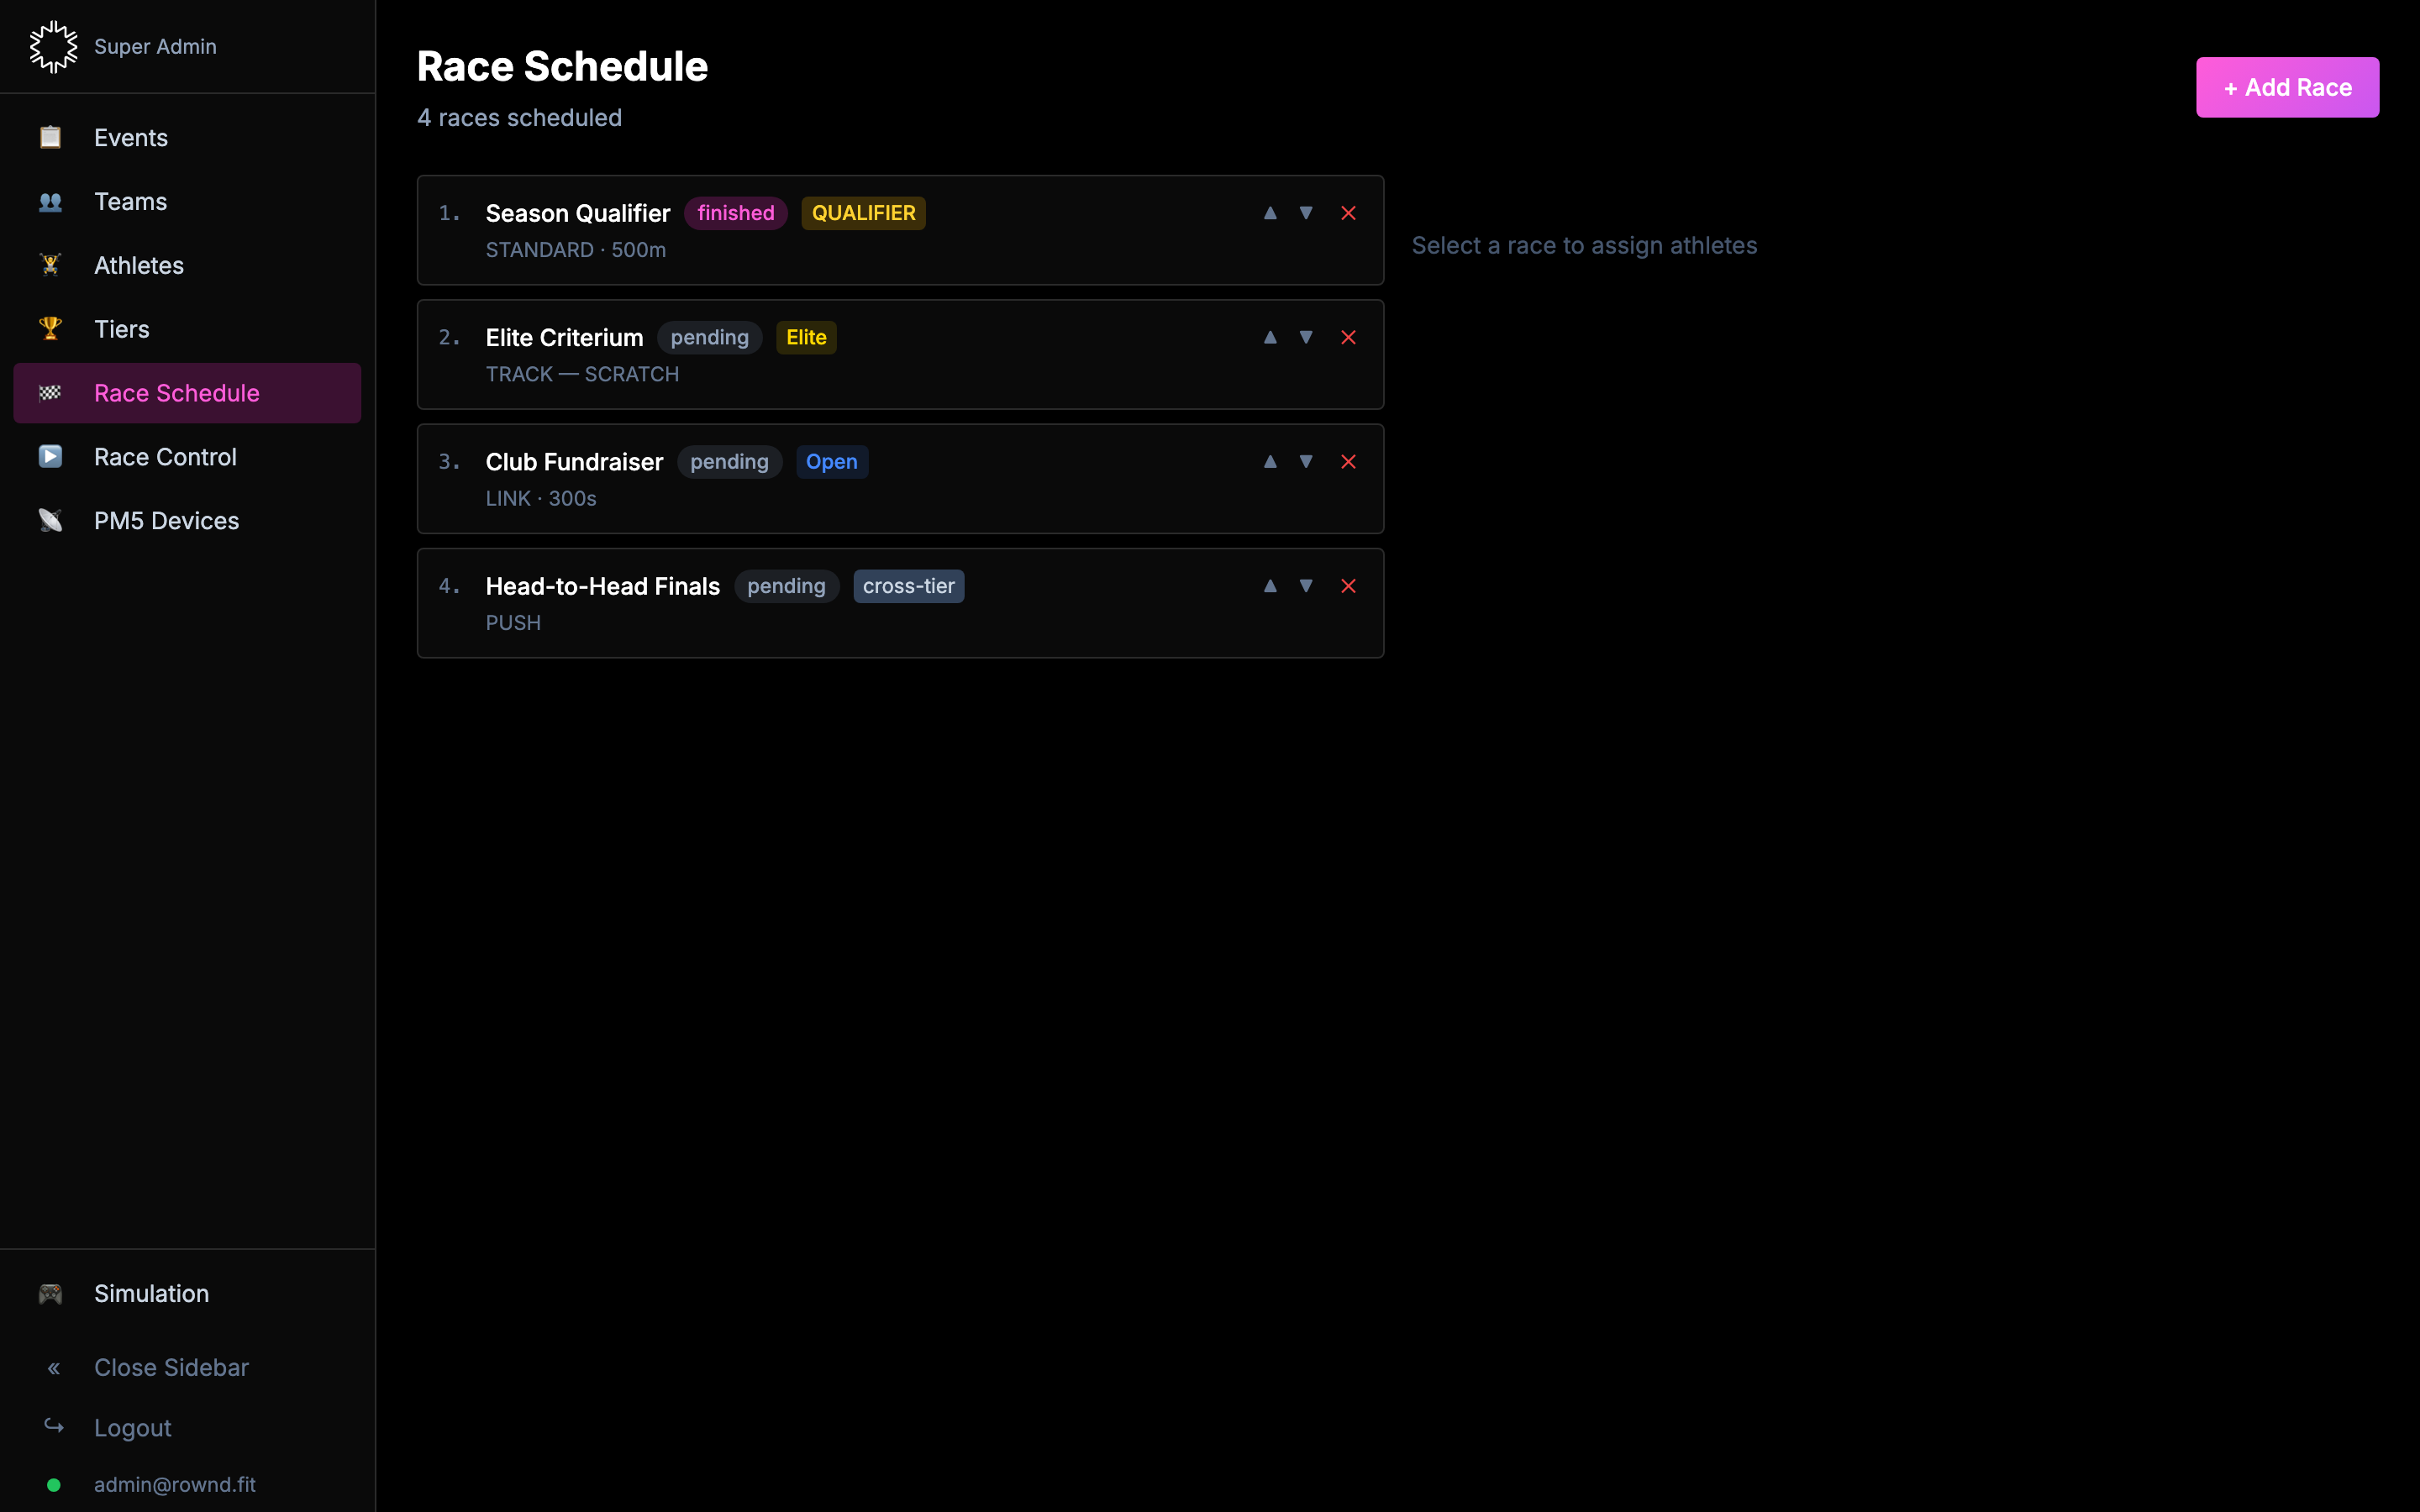
The Race Schedule page is where you set up every race of the event, in the order they'll run.
- Open Race Schedule.
- Click + Add Race. Give it a name.
- Pick a race type (see below). Fill in the type-specific config.
- If this is a tier-scoped race (not a qualifier), pick a tier from the Tier dropdown. Only teams in that tier will be eligible.
- Click Create.
- Use the ▲ / ▼ arrows on each row to re-order. Drag-handle-free by design.
Race types at a glance
- STANDARD — head-to-head race to a fixed distance or for a fixed time.
- TRACK — lap-based race. Three modes:
- Scratch — everyone laps side-by-side until someone finishes.
- Switch — team relay, athletes rotate laps.
- Chase — staggered start, caught rowers are eliminated.
- PUSH — tug-of-war, two teams, combined-watts based marker.
- LINK — duration race, team score = sum of all athletes' distance.
- CADENCE — team power race, with a penalty for SPM mismatch.
For a deeper look at each race type — including scoring rules — see the race types reference.
Assigning participants
After creating a race, click its row. A participant picker appears on the right.
- Tick each athlete that should race.
- For each selected athlete, pick their PM5 device from the dropdown.
- Click Save Participants.
If the race is tier-scoped, only athletes in that tier appear. To include an off-tier team (for an exhibition race), tick Allow cross-tier participants when you create the race.
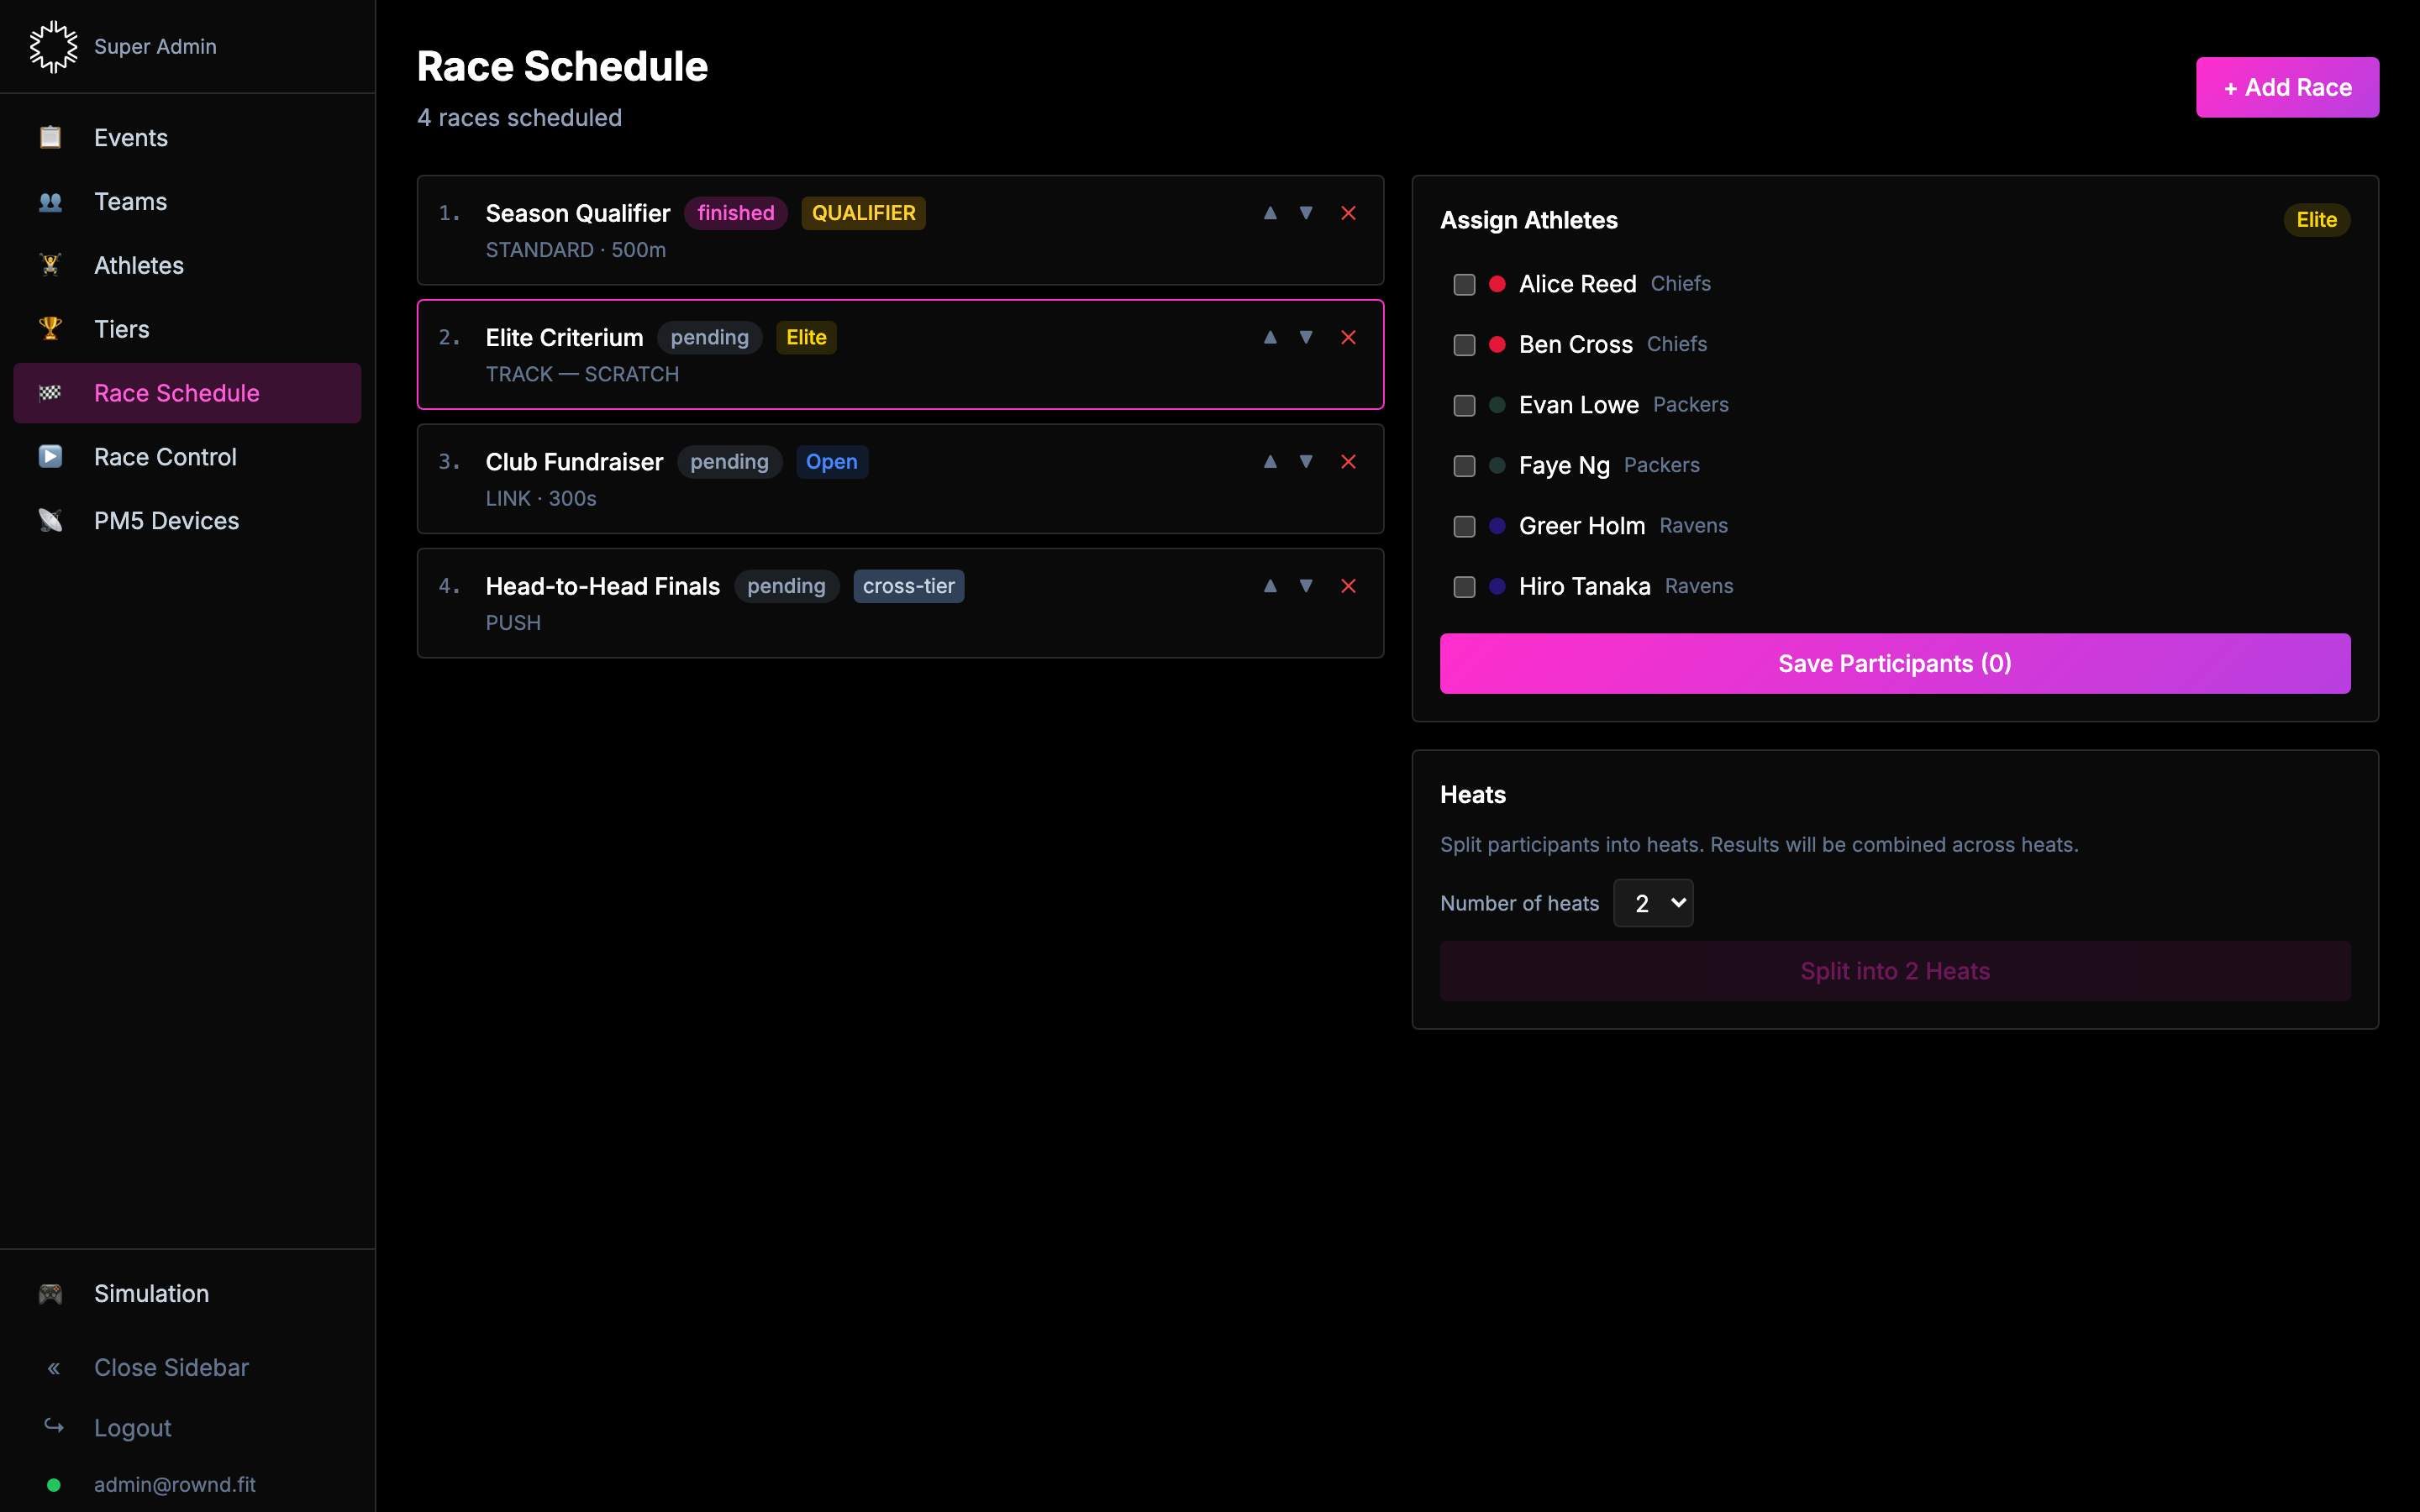
Splitting a race into heats
Use heats when a race has too many participants to run at once (you only have so many rowers). Results are combined across heats automatically.
- Pick the race, assign all participants.
- In the Heats panel, pick how many heats you want.
- Click Split into N Heats. Teams are distributed evenly via round-robin.
- Run the heats one at a time from Race Control. The next pending heat runs automatically.
9. Race Control (Race Control role only)
Once your schedule is set up, Race Control is where you run the event. It's the live view — live stats, connection health, and the big start/stop buttons.
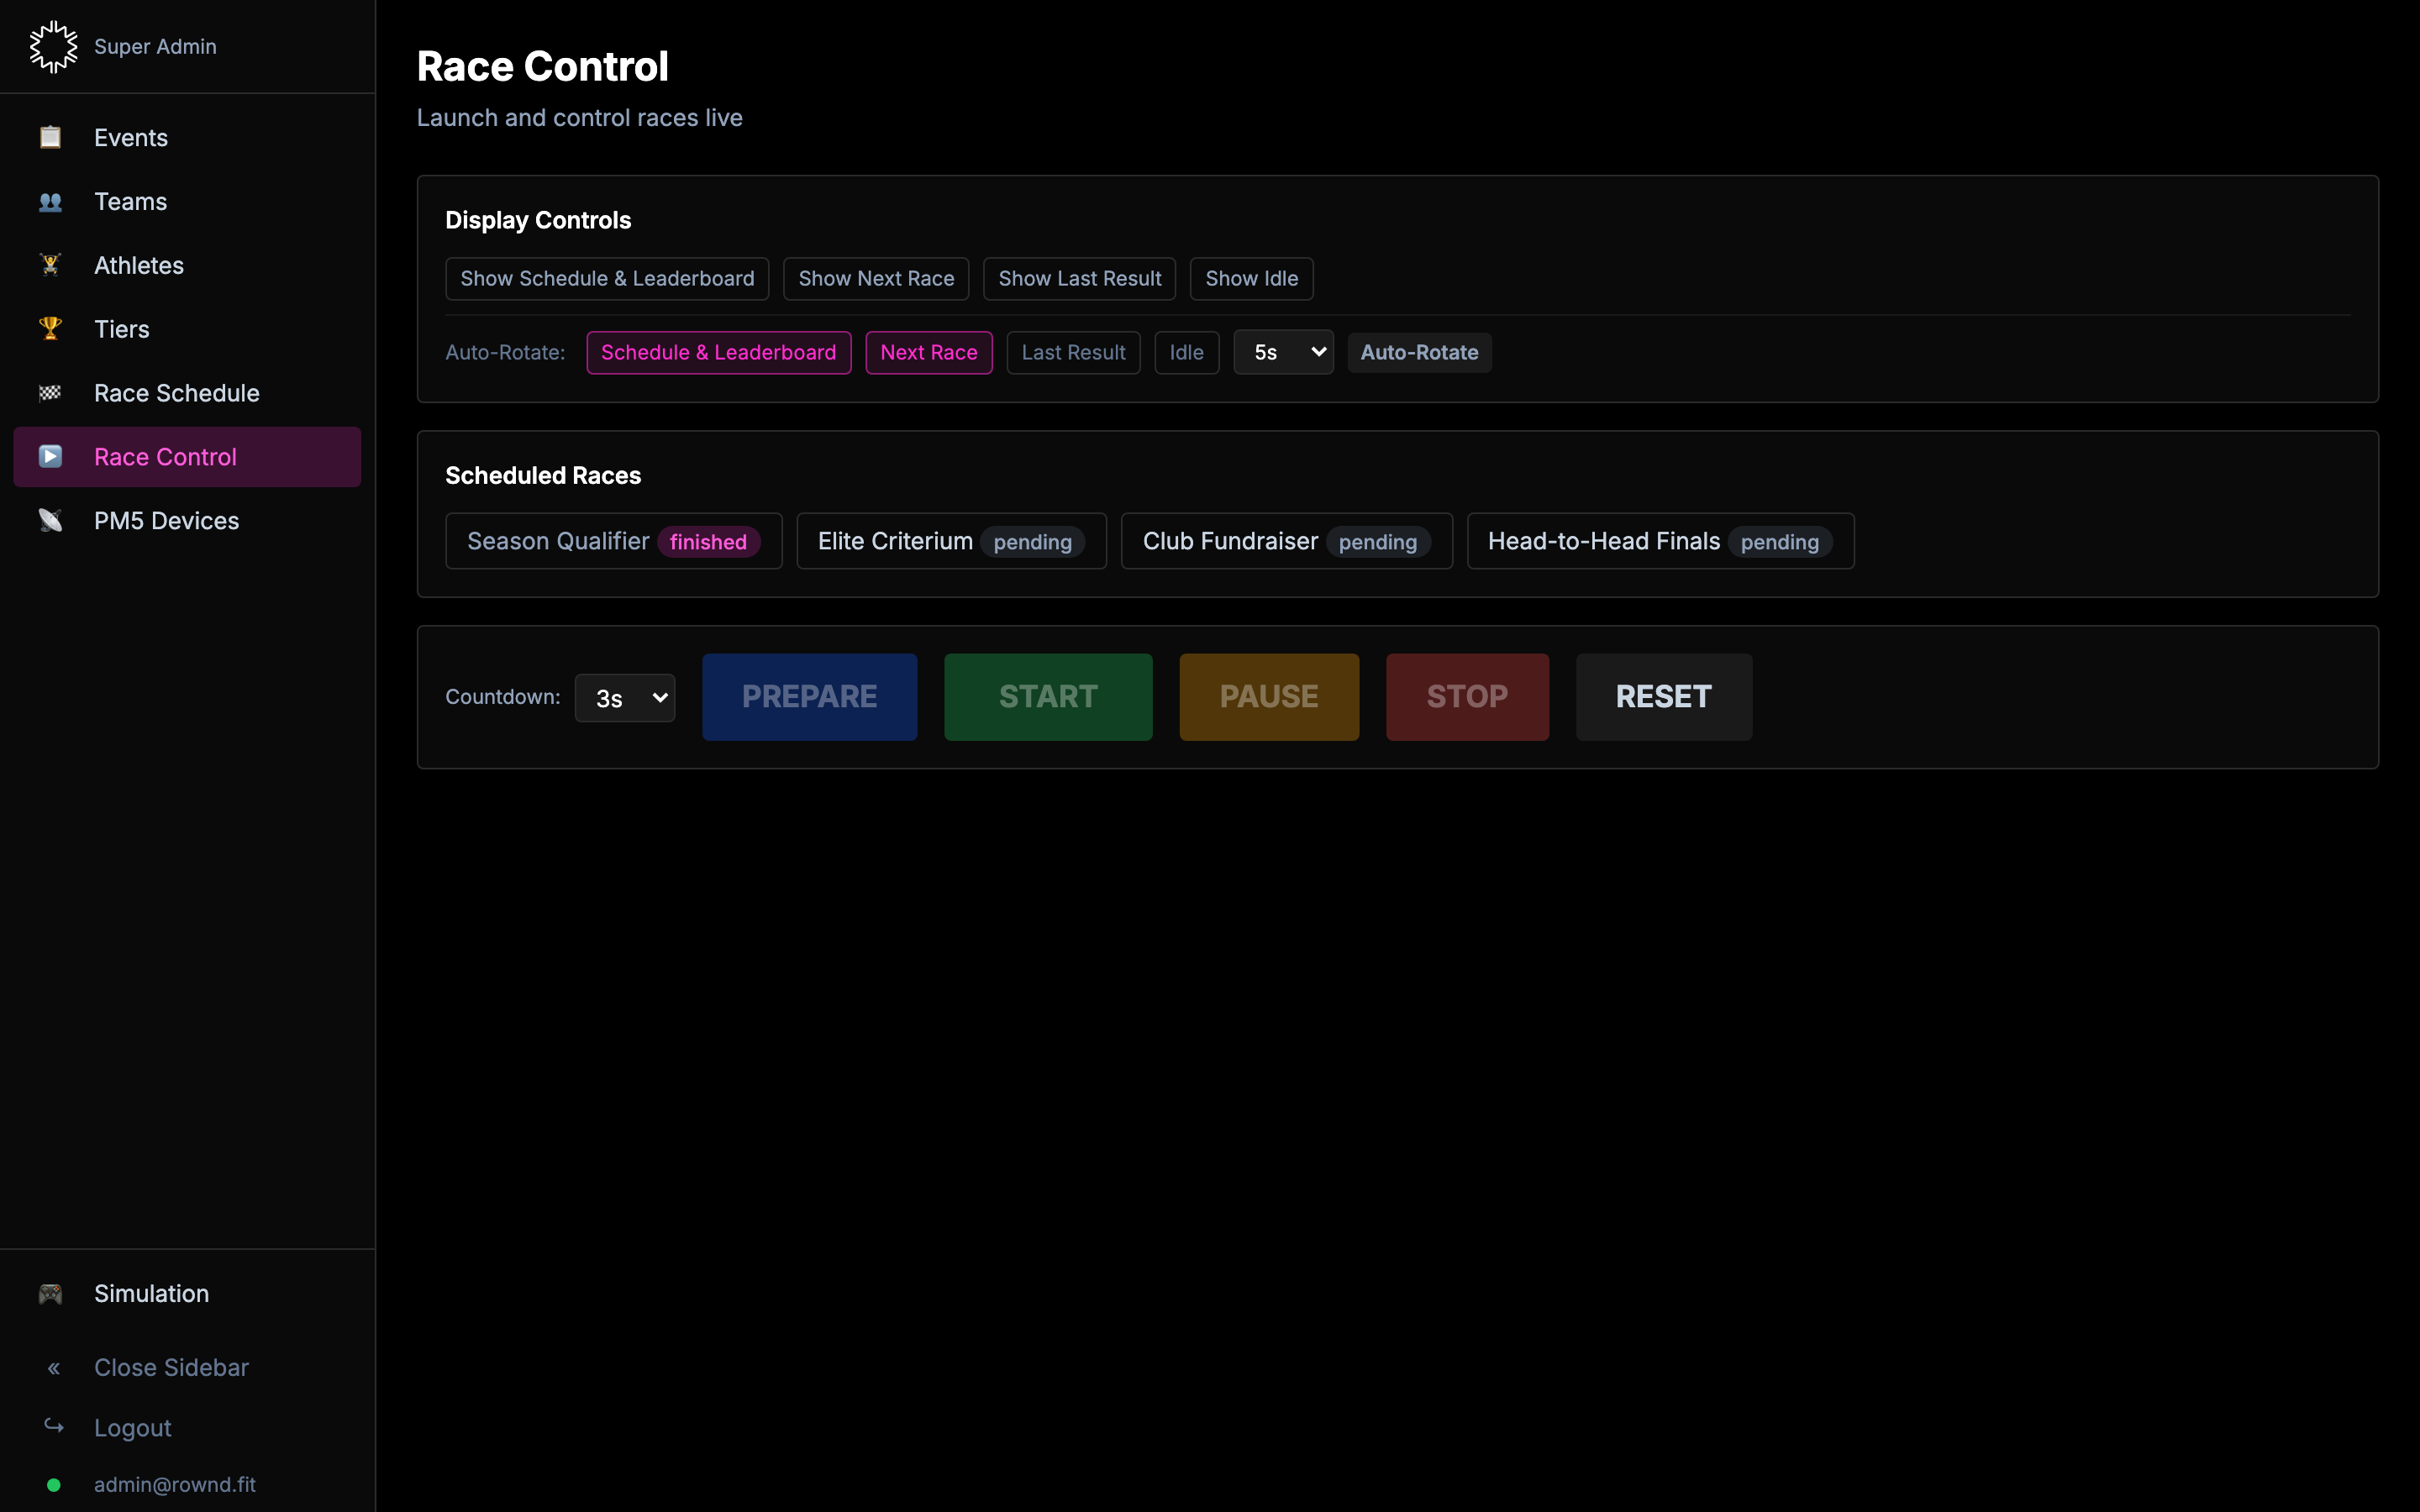
Prepare → Start → Stop
- PREPARE — sends the workout config to every PM5 and shows the correct screen. Do this once everyone is on their machine. The machines are idle until START.
- START — kicks off a 3-second countdown broadcast to every display, then the race engine starts.
- PAUSE (optional) — pauses the engine clock if you need to intervene. Not supported on all race types.
- STOP — ends the race. Results are saved automatically, points awarded, the next race loaded.
- RESET — if the machines get stuck, this does a full 5-step PM5 reset plus a race-engine reset. Safe to press any time.
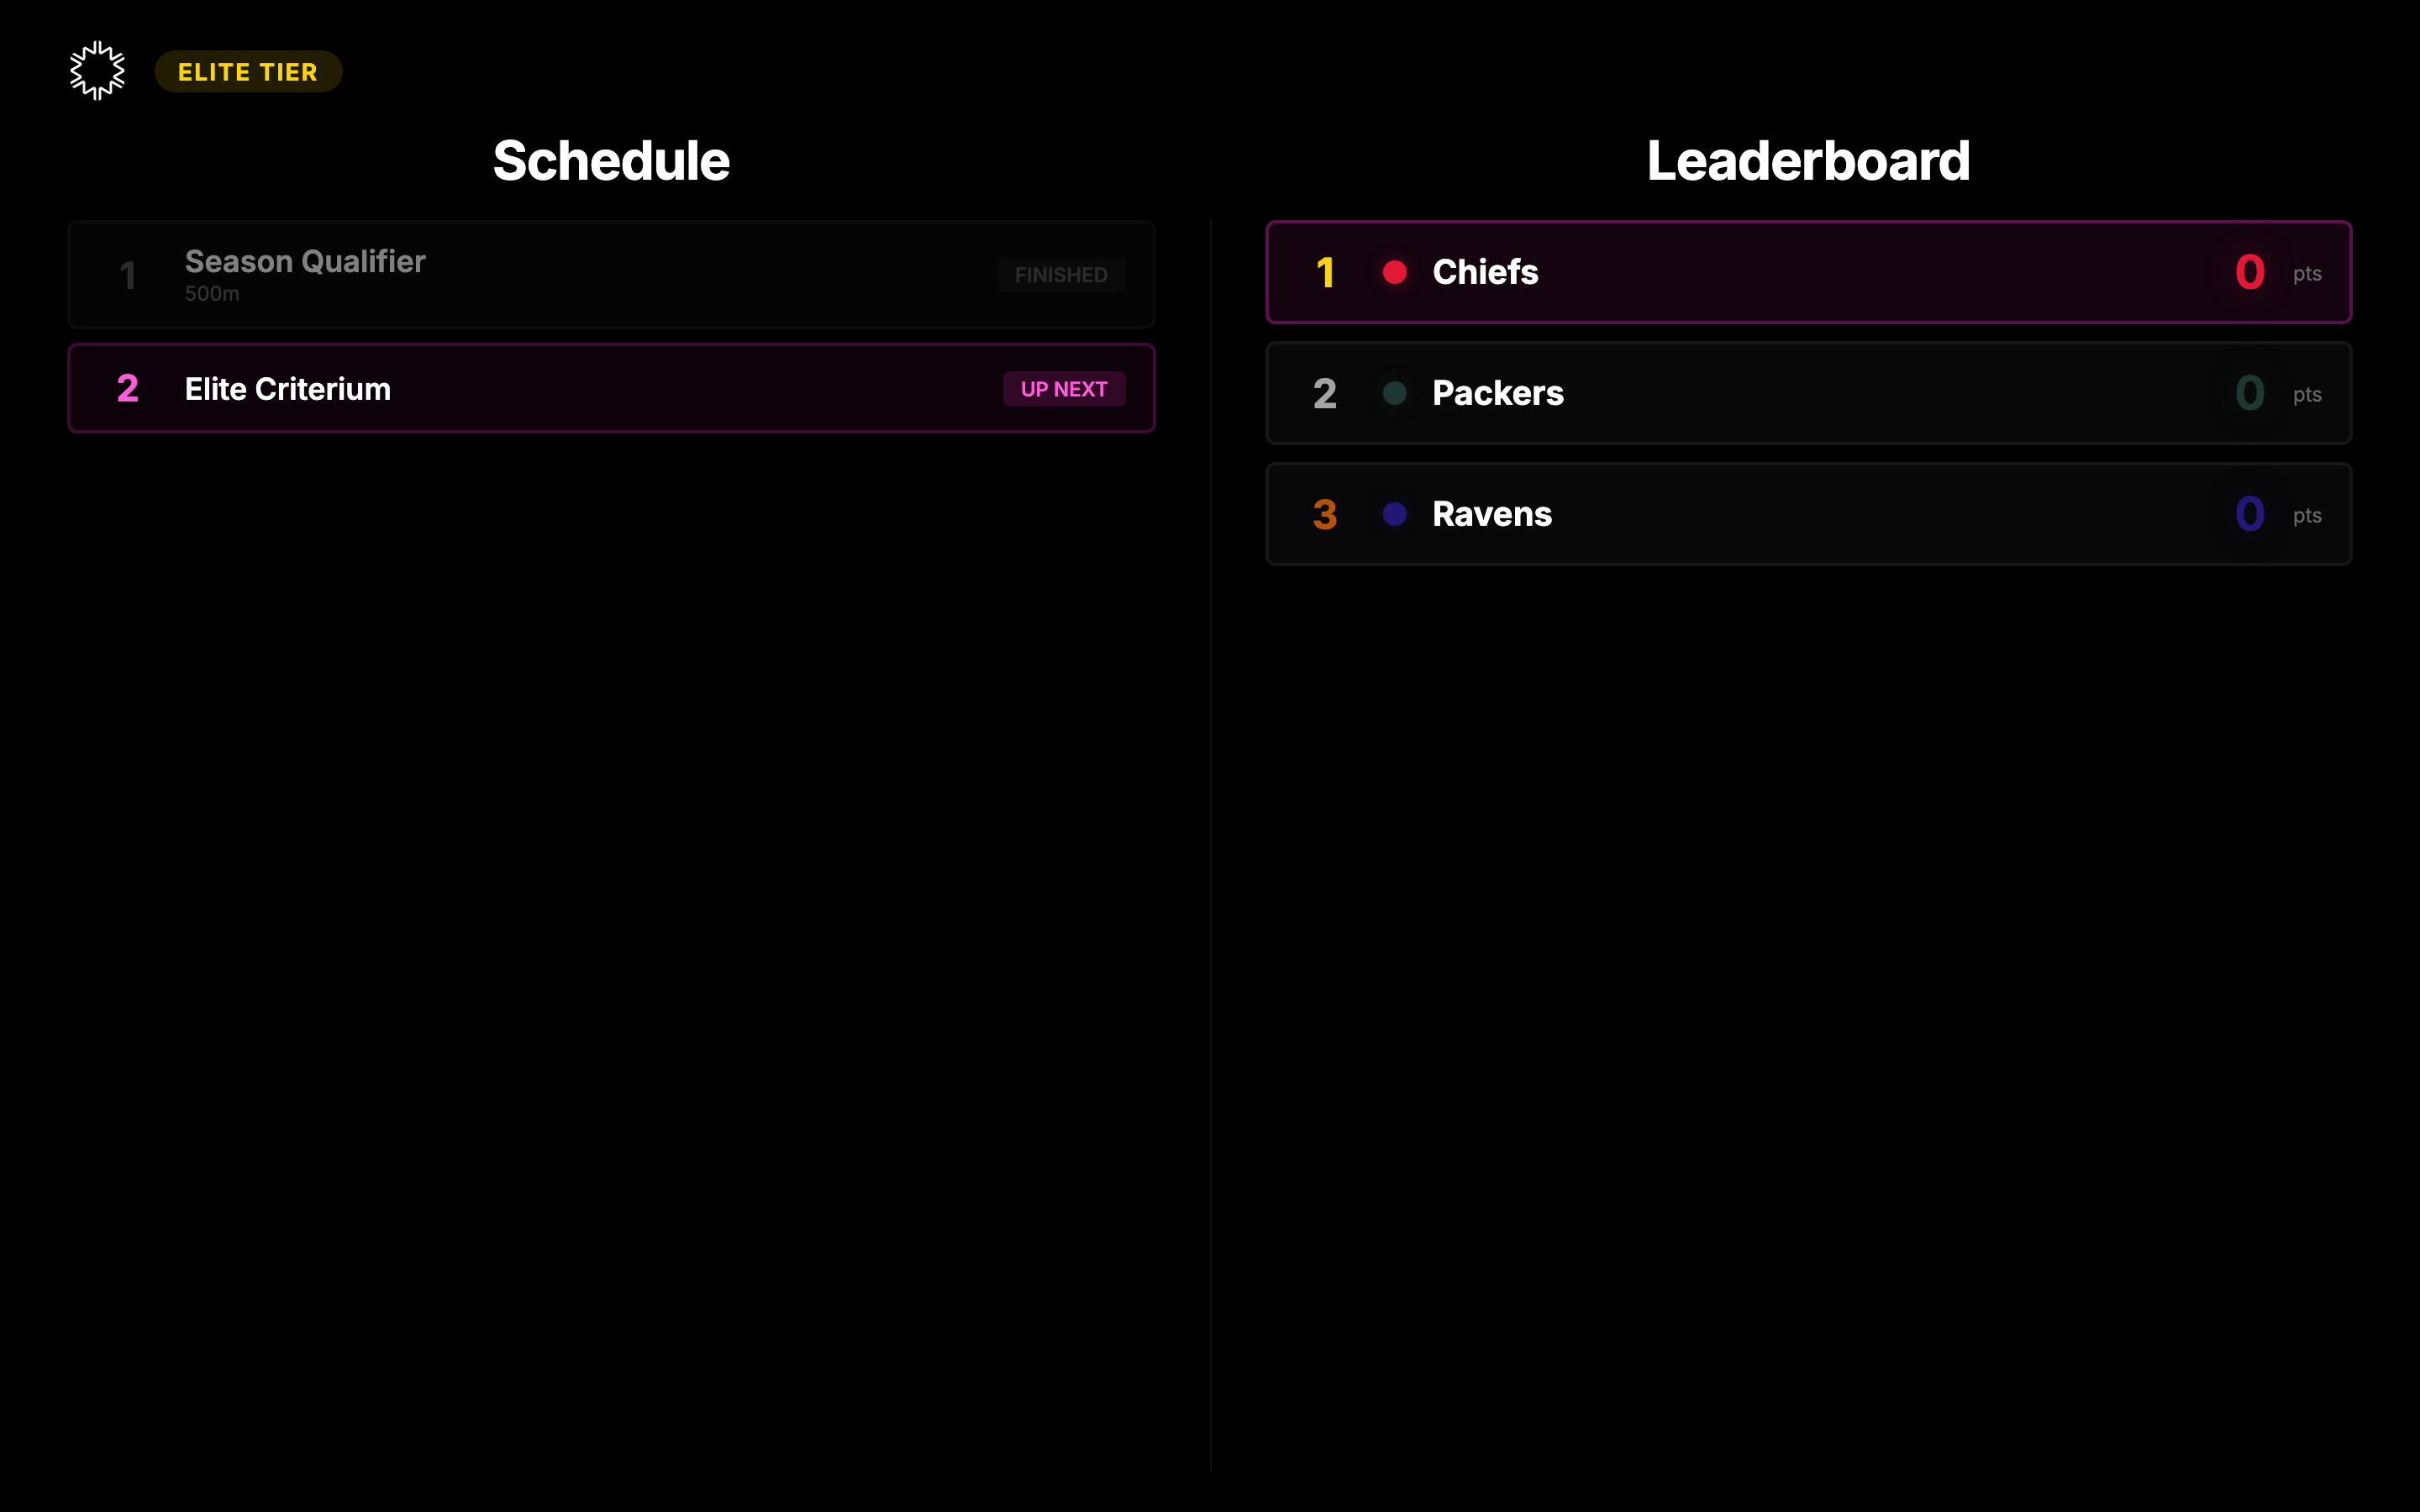
10. Display & spectators
The Display tab in the sidebar opens a separate tab showing what the big screens see. Spectators see the same race animations, plus the between-race schedule and leaderboard.
When a race is tier-scoped, the leaderboard on the display automatically narrows to that tier. When a cross-tier or all-tiers view is needed, the admin can push All tiers explicitly from Race Control.
That's it
You're ready to run an event. If something goes wrong mid-race, the RESET button in Race Control is your friend — it will always get the machines back to a known-good state.